
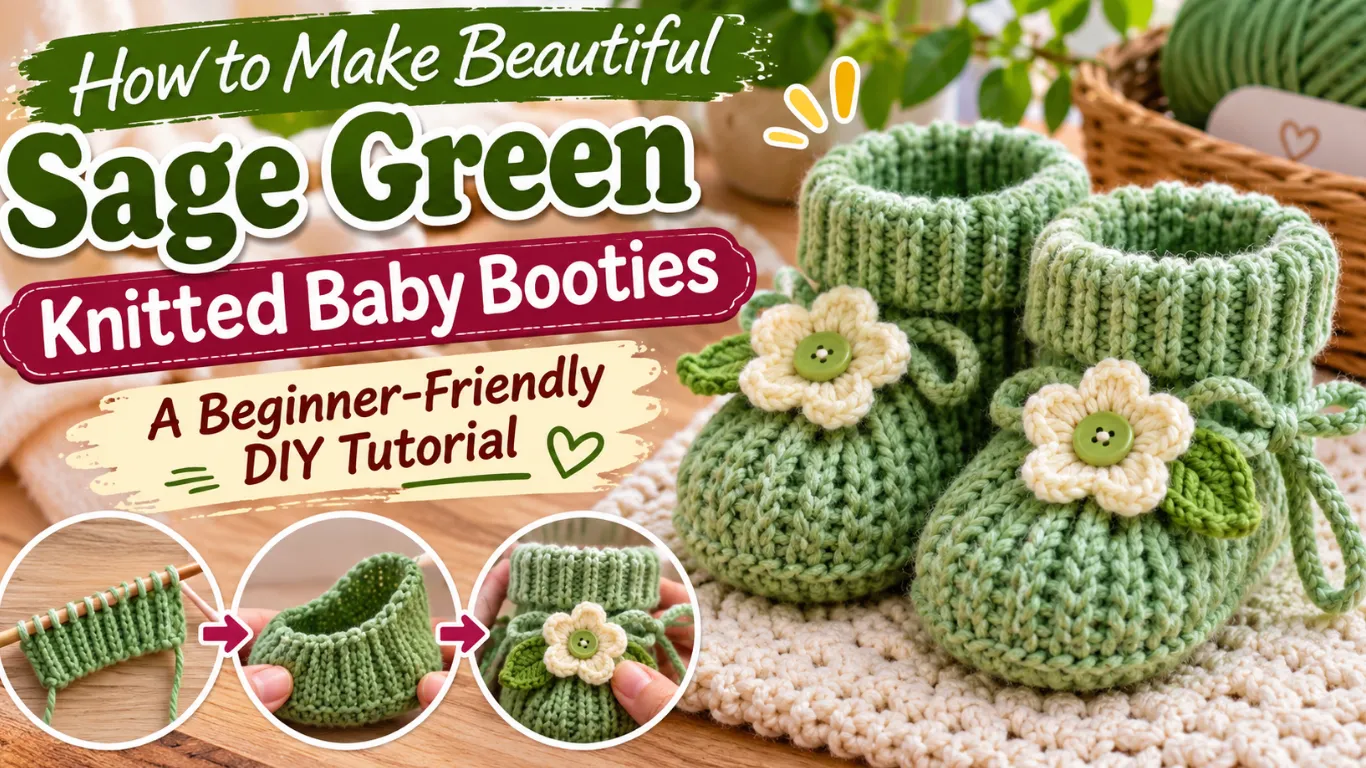
There is something special about handmade baby clothes. A small knitted item can become a lovely keepsake, especially when it is made with soft yarn and a little attention to detail. Baby booties are one of those projects that are both useful and beautiful.
These sage green knitted baby booties have a charming design, featuring a soft ribbed ankle cuff, textured sides, a decorative front panel, and a small knitted bow. The gentle green shade gives them a fresh, natural look that works beautifully for baby showers, newborn gifts, and handmade baby collections.
The good news is that you do not need to be an expert knitter to make a similar pair. With basic knitting skills, suitable yarn, and a little patience, you can create your own adorable baby booties at home.
In this tutorial, you will learn about the materials, basic stitches, construction, finishing touches, and helpful tips for making a beautiful pair.
1. Materials You Need to Make Knitted Baby Booties
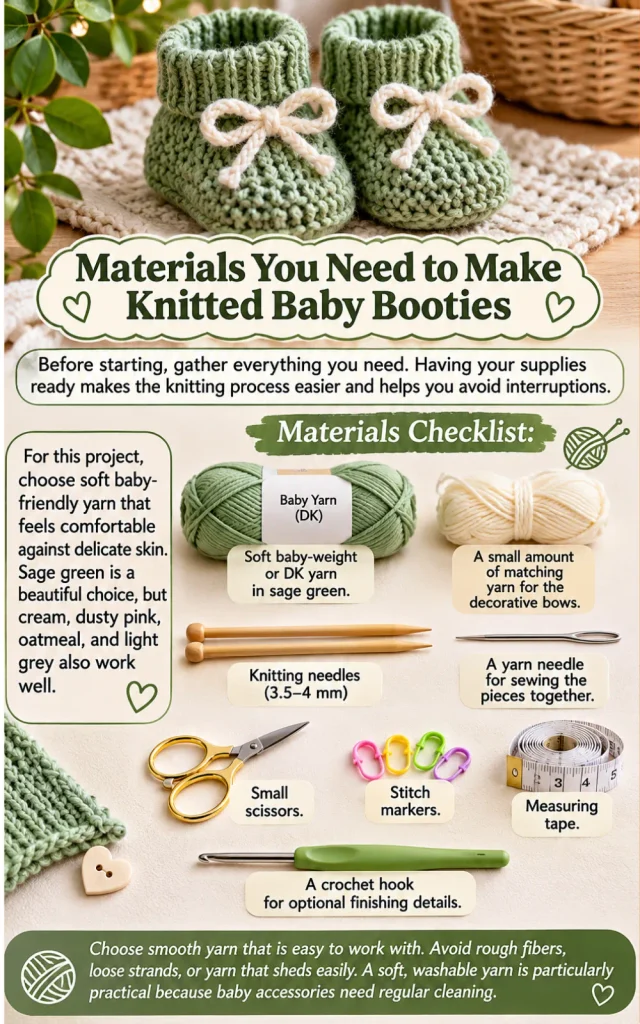
Before starting, gather everything you need. Having your supplies ready makes the knitting process easier and helps you avoid interruptions.
For this project, choose soft baby-friendly yarn that feels comfortable against delicate skin. Sage green is a beautiful choice, but cream, dusty pink, oatmeal, and light grey also work well.
Materials checklist:
- Soft baby-weight or DK yarn in sage green.
- A small amount of matching yarn for the decorative bows.
- Suitable knitting needles, usually 3.5–4 mm depending on your yarn.
- A yarn needle for sewing the pieces together.
- Small scissors.
- Stitch markers.
- Measuring tape.
- A crochet hook for optional finishing details.
Choose smooth yarn that is easy to work with. Avoid rough fibers, loose strands, or yarn that sheds easily. A soft, washable yarn is particularly practical because baby accessories need regular cleaning.
2. Choose the Right Yarn and Knitting Needles
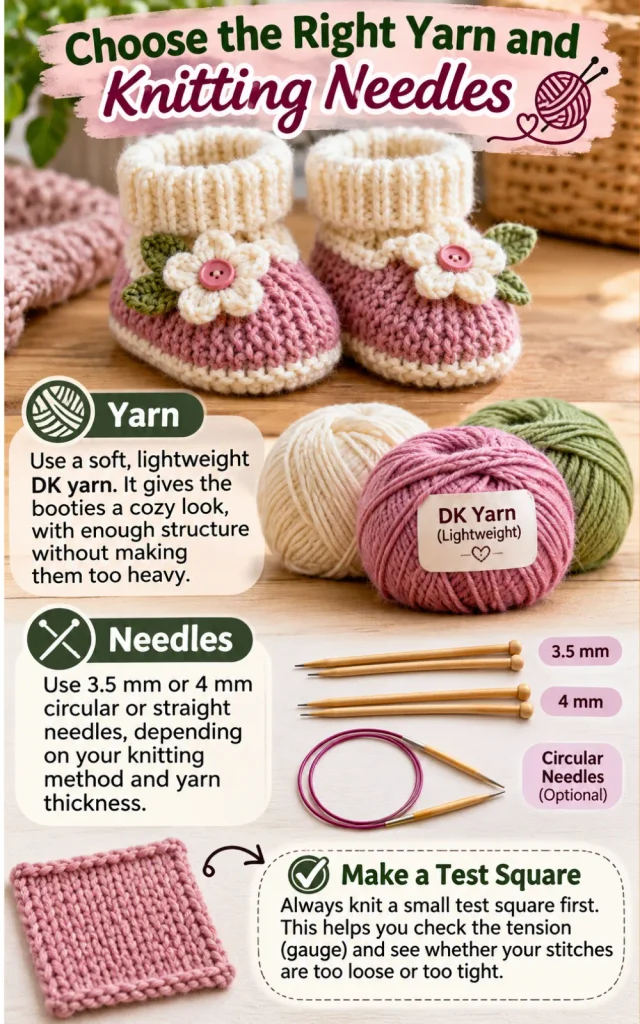
The yarn makes a big difference in the final appearance of your baby booties. The original design has a thick, soft texture that gives the shoes a cozy handmade finish.
A lightweight DK yarn is a good starting point for this project. It provides enough structure for the booties without making them unnecessarily heavy.
For the needles, 3.5 mm or 4 mm circular or straight needles may work, depending on your knitting method and yarn thickness.
Always make a small test square before starting. This helps you check the tension and see whether your stitches are too loose or too tight.
For baby booties, you want a comfortable fabric that holds its shape while remaining soft and flexible.
3. Learn the Basic Knitting Stitches
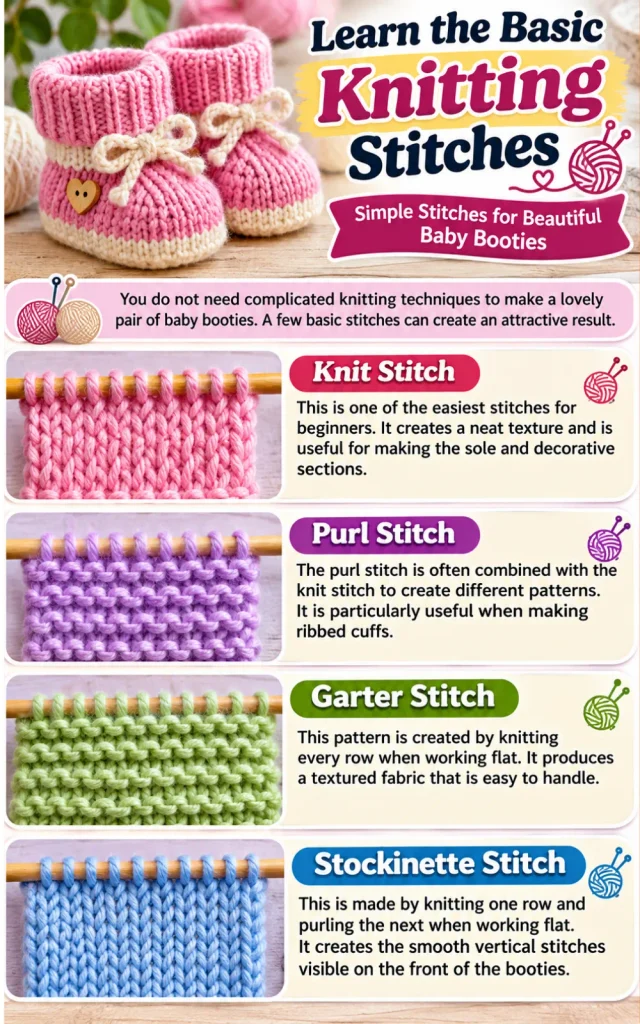
You do not need complicated knitting techniques to make a lovely pair of baby booties. A few basic stitches can create an attractive result.
Knit Stitch: This is one of the easiest stitches for beginners. It creates a neat texture and is useful for making the sole and decorative sections.
Purl Stitch: The purl stitch is often combined with the knit stitch to create different patterns. It is particularly useful when making ribbed cuffs.
Garter Stitch: This pattern is created by knitting every row when working flat. It produces a textured fabric that is easy to handle.
Stockinette Stitch: This is made by knitting one row and purling the next when working flat. It creates the smooth vertical stitches visible on the front of the booties.
1×1 Ribbing: Alternate one knit stitch and one purl stitch. This creates a stretchy fabric that works well around the ankle.
Practice these stitches using a small piece of yarn before beginning the actual project.
4. Start by Knitting the Baby Bootie Sole
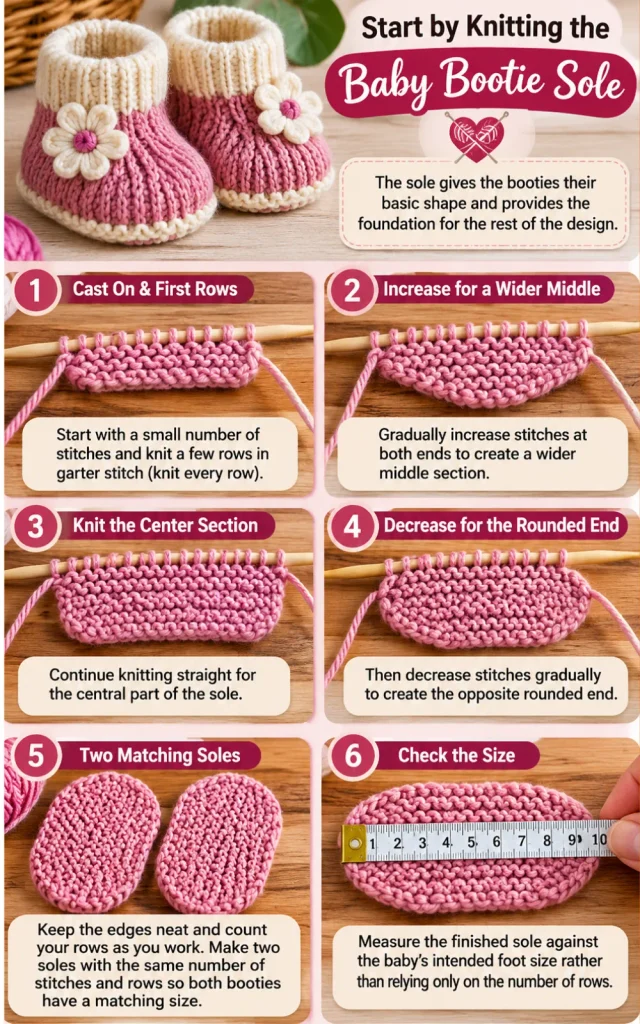
The sole gives the booties their basic shape and provides the foundation for the rest of the design.
For a simple beginner version, work the sole separately using garter stitch. Start with a small number of stitches and gradually increase at both ends to create a wider middle section.
Continue knitting straight for the central part of the sole. Then decrease stitches gradually to create the opposite rounded end.
Keep the edges neat and count your rows as you work. Making two soles with the same number of stitches and rows is important because you want both booties to have a matching size.
Measure the finished sole against the baby’s intended foot size rather than relying only on the number of rows.
5. Create the Beautiful Textured Front Section
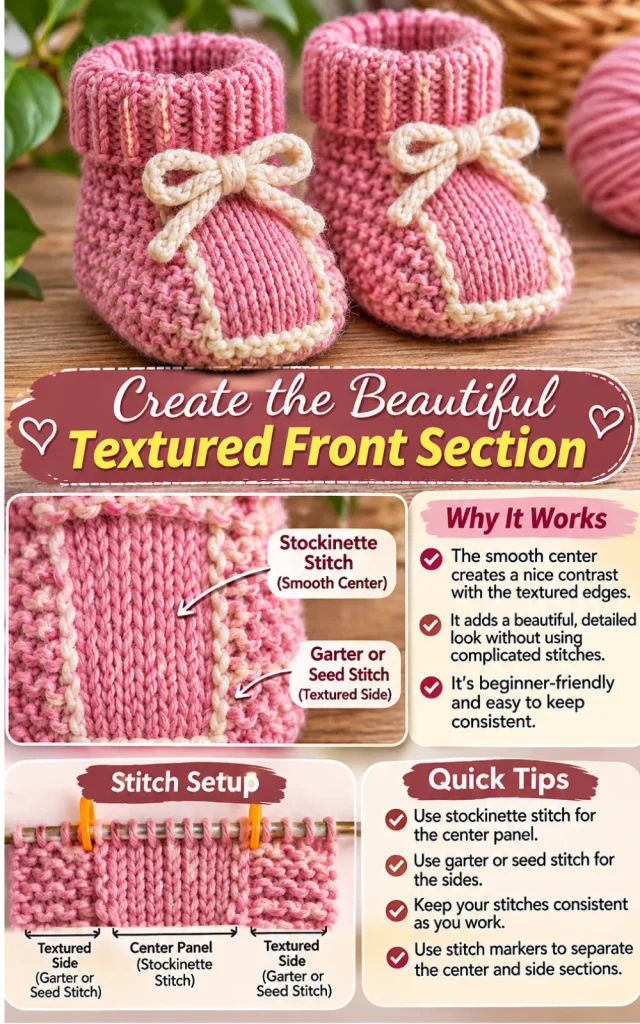
One of the prettiest details in the inspiration image is the smooth knitted panel on the front of each bootie.
This section stands out because it has a different texture from the surrounding fabric. You can recreate a similar appearance by using stockinette stitch for the central panel and garter or seed stitch around the sides.
The smooth center creates a lovely contrast with the bumpy textured edges.
Keep your stitches consistent as you work. If you are a beginner, use stitch markers to separate the center panel from the side sections.
This simple combination gives the booties a more detailed appearance without requiring complicated knitting techniques.
6. Add the Decorative Side Stitching
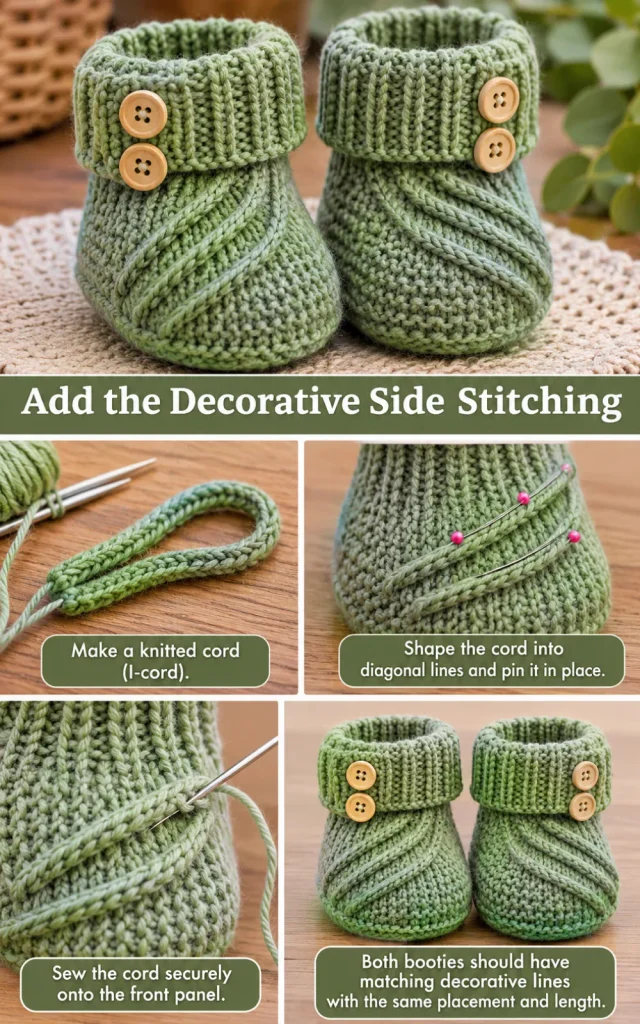
The raised lines running diagonally across the front of the inspiration booties make the design look especially attractive.
You can create a similar decorative effect using simple knitted cords or a raised embroidery technique.
For a knitted cord, make a narrow I-cord using a small number of stitches. Once it reaches the required length, gently shape it into the desired diagonal lines and sew it securely onto the front panel.
Use matching sage green yarn so the decoration blends naturally with the rest of the bootie.
Take your time with this part. Both booties should have similar decorative lines, with the same placement and length.
7. Make the Ribbed Ankle Cuffs
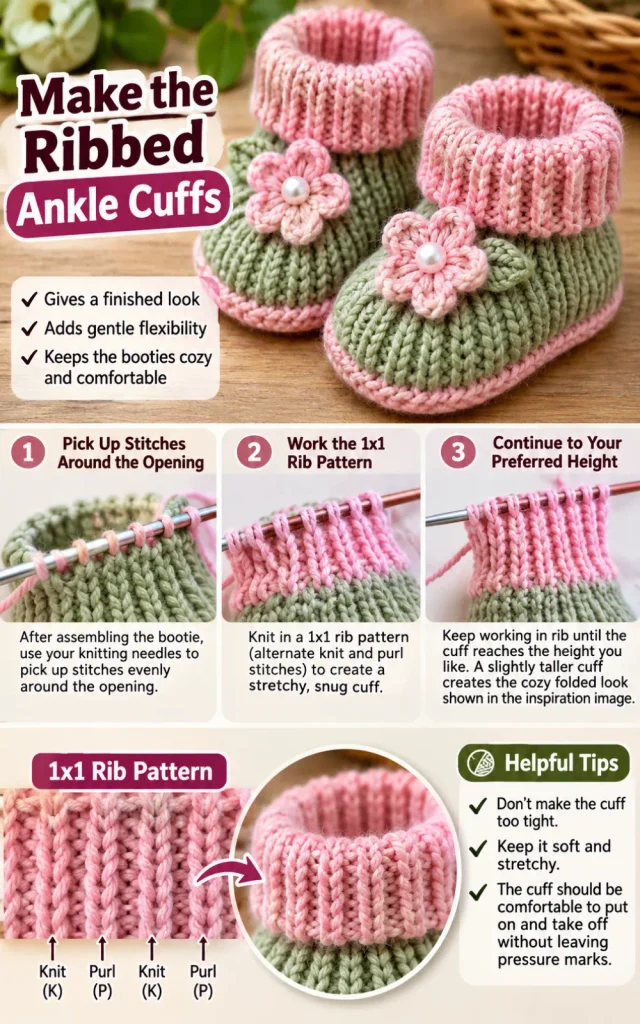
The ribbed ankle cuffs are another important feature of this design.
They give the booties a finished appearance and provide a little flexibility around the ankle.
Once the main bootie sections have been assembled, pick up stitches around the opening using your knitting needles.
Work in a 1×1 rib pattern by alternating knit and purl stitches. Continue until the cuff reaches your preferred height.
A cuff that is slightly taller creates the cozy folded-looking appearance shown in the inspiration image.
Avoid making the ankle opening too tight. Baby booties should be comfortable to put on and remove without leaving pressure marks.
8. Create the Cute Knitted Bows
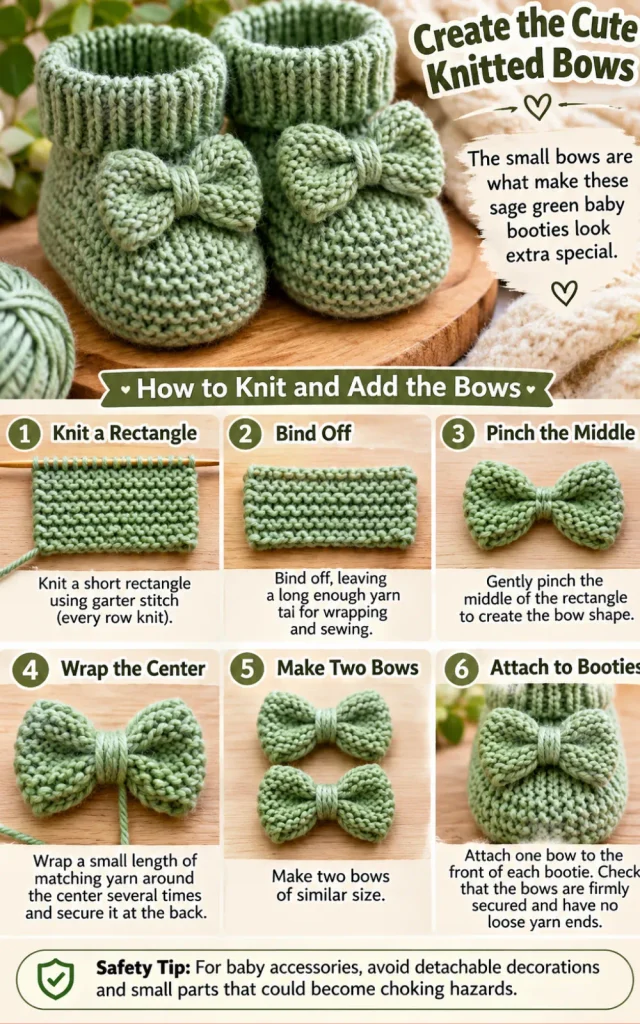
The small bows are what make these sage green baby booties look extra special.
You can make simple knitted bows using a small rectangular piece of fabric.
Knit a short rectangle using garter stitch. Bind off, then gently pinch the middle to create the bow shape.
Wrap a small length of matching yarn around the center several times and secure it at the back.
Make two bows of similar size and attach one to the front of each bootie.
Check that the bows are firmly secured and have no loose yarn ends. For baby accessories, avoid detachable decorations and small parts that could become choking hazards.
9. Assemble the Booties Carefully
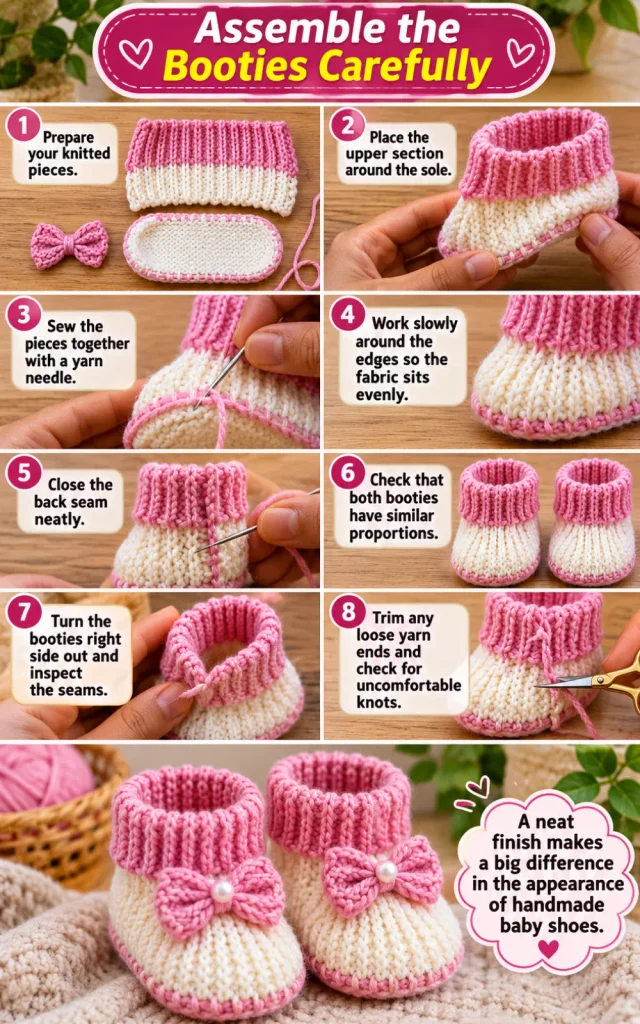
Once the knitted pieces are ready, it is time to bring everything together.
Place the upper section around the sole and use a yarn needle to sew the pieces together with matching yarn.
Work slowly around the edges so the fabric sits evenly. Avoid pulling the yarn too tightly because this can make the booties uncomfortable or change their shape.
Next, close the back seam neatly and check that the two booties have similar proportions.
Turn the finished pieces right side out and inspect the seams. Trim loose yarn ends and make sure there are no uncomfortable knots inside.
A neat finish makes a big difference in the appearance of handmade baby shoes.
10. Choose Beautiful Colors for Your Baby Booties
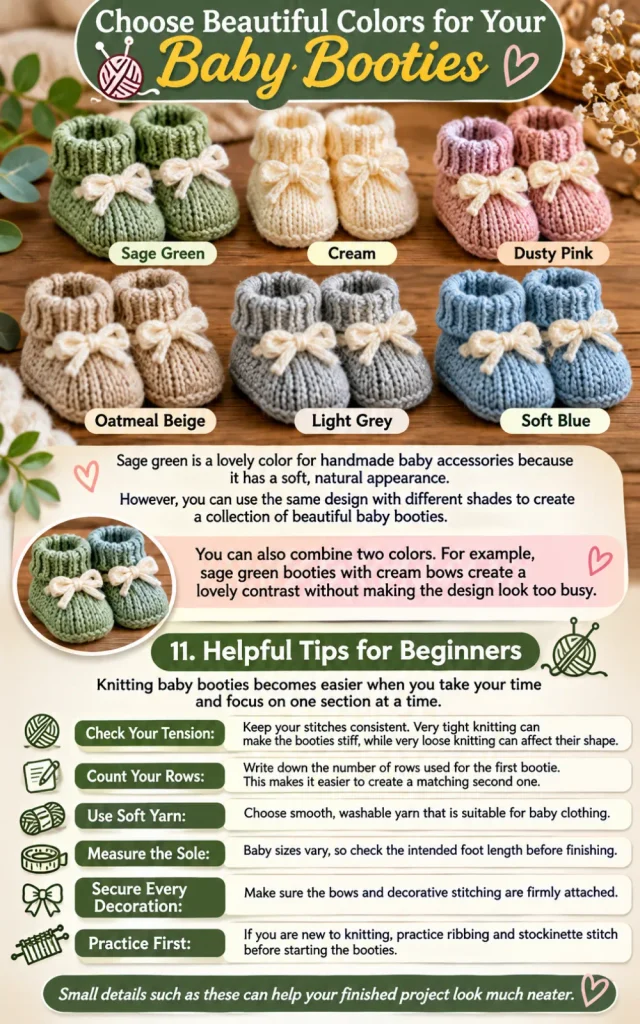
Sage green is a lovely color for handmade baby accessories because it has a soft, natural appearance.
However, you can use the same design with different shades to create a collection of beautiful baby booties.
Here are some color ideas:
- Sage Green: Fresh, gentle, and natural-looking.
- Cream: A timeless choice for newborn gifts.
- Dusty Pink: A soft color for a delicate handmade design.
- Oatmeal Beige: Beautiful for a neutral baby collection.
- Light Grey: A simple shade that works with many baby outfits.
- Soft Blue: A classic option for knitted baby accessories.
You can also combine two colors. For example, sage green booties with cream bows create a lovely contrast without making the design look too busy.
11. Helpful Tips for Beginners
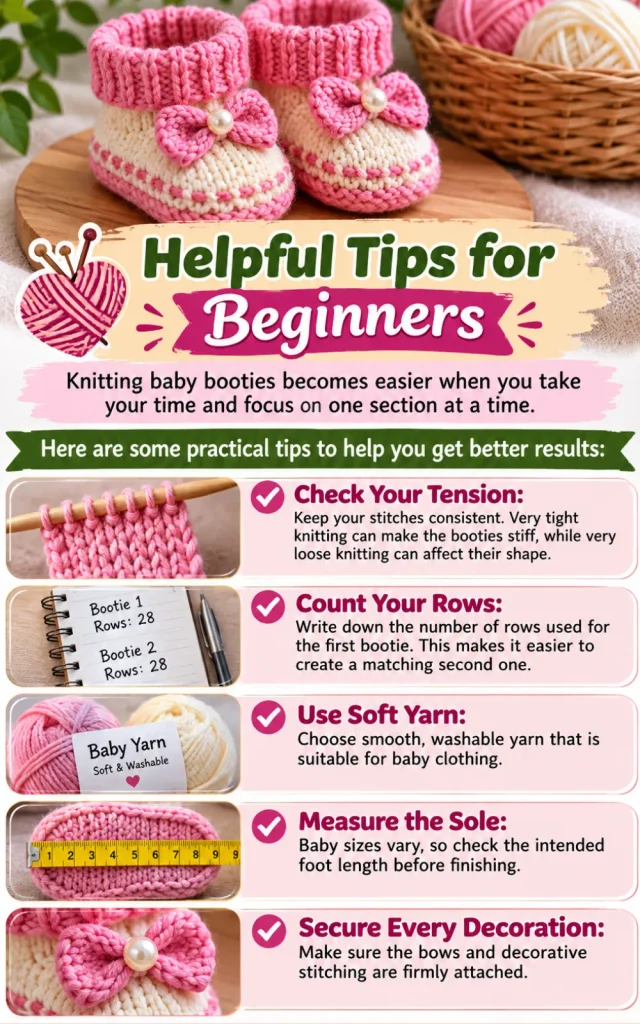
Knitting baby booties becomes easier when you take your time and focus on one section at a time.
Here are some practical tips to help you get better results:
Check Your Tension: Keep your stitches consistent. Very tight knitting can make the booties stiff, while very loose knitting can affect their shape.
Count Your Rows: Write down the number of rows used for the first bootie. This makes it easier to create a matching second one.
Use Soft Yarn: Choose smooth, washable yarn that is suitable for baby clothing.
Measure the Sole: Baby sizes vary, so check the intended foot length before finishing.
Secure Every Decoration: Make sure the bows and decorative stitching are firmly attached.
Practice First: If you are new to knitting, practice ribbing and stockinette stitch before starting the booties.
Small details such as these can help your finished project look much neater.
12. How to Care for Handmade Knitted Baby Booties
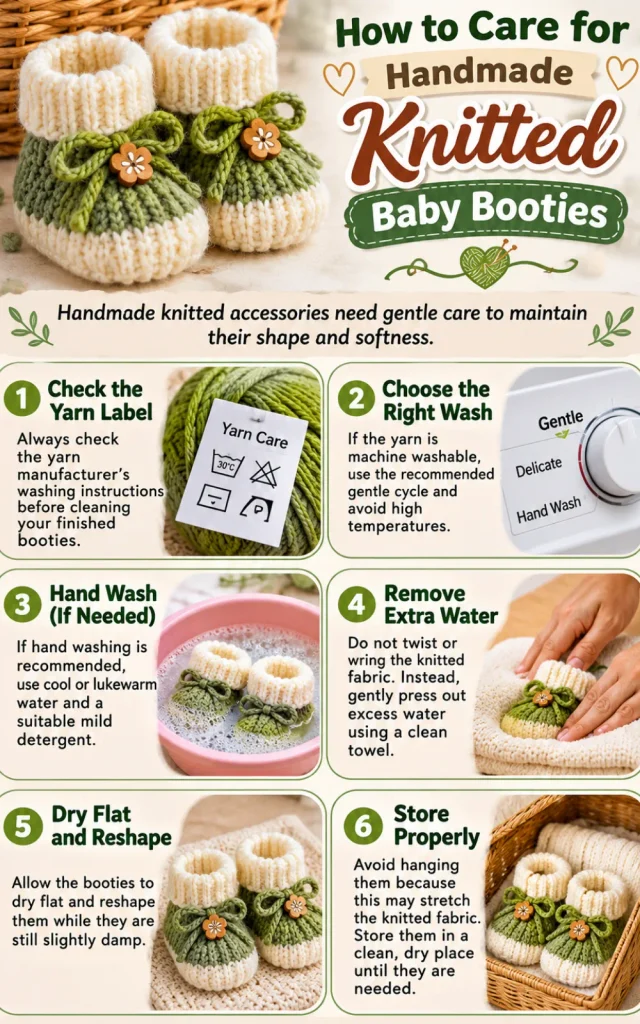
Handmade knitted accessories need gentle care to maintain their shape and softness.
Always check the yarn manufacturer’s washing instructions before cleaning your finished booties.
If the yarn is machine washable, use the recommended gentle cycle and avoid high temperatures. If hand washing is recommended, use cool or lukewarm water and a suitable mild detergent.
Do not twist or wring the knitted fabric. Instead, gently press out excess water using a clean towel.
Allow the booties to dry flat and reshape them while they are still slightly damp.
Avoid hanging them because this may stretch the knitted fabric. Store them in a clean, dry place until they are needed.
13. Lovely Ways to Gift Your Handmade Baby Booties
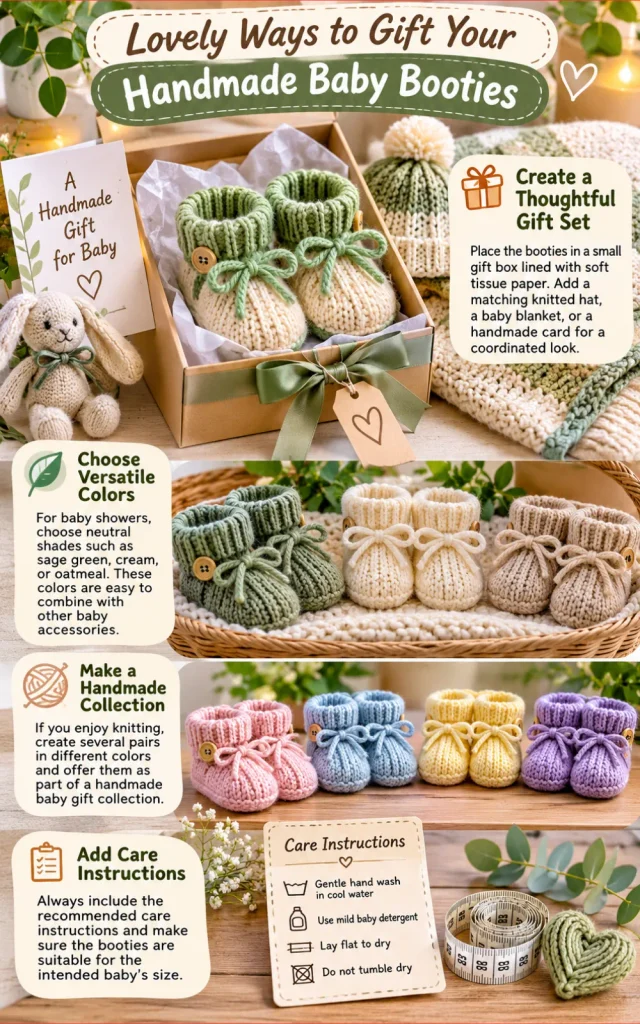
These knitted baby shoes can make a thoughtful addition to a handmade baby gift.
You can place the finished pair inside a small gift box lined with soft tissue paper. Add a matching knitted hat, a baby blanket, or a simple handmade card for a coordinated presentation.
For baby showers, choose neutral colors such as sage green, cream, or oatmeal. These shades are easy to combine with other baby accessories.
If you enjoy knitting, you could also create several pairs in different colors and offer them as part of a handmade baby gift collection.
Always include the recommended care instructions and make sure the booties are suitable for the intended baby’s size.
5 Premium Knitting Supplies Worth Recommending
1. ChiaoGoo TWIST Red Lace Interchangeable Knitting Needle Set
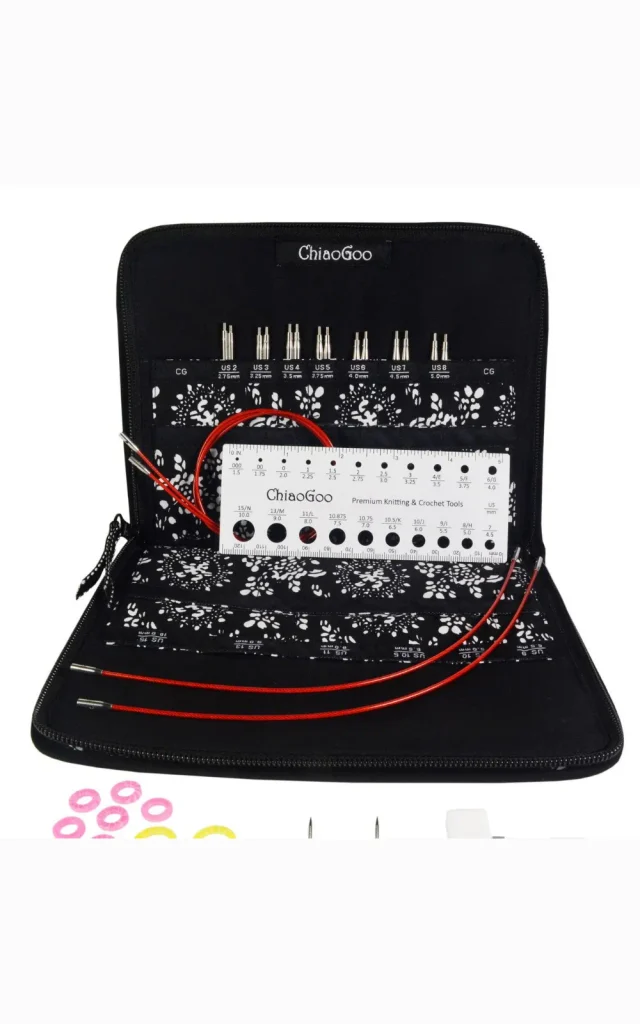
A premium needle collection for knitters who regularly make baby clothes, socks, accessories, and other detailed projects. It includes stainless steel tips and flexible cables.
PREMIUM PICK
Suggested Supply: 👉👉 Check price on Amazon.com
2. Clover Takumi Bamboo Knitting Needles
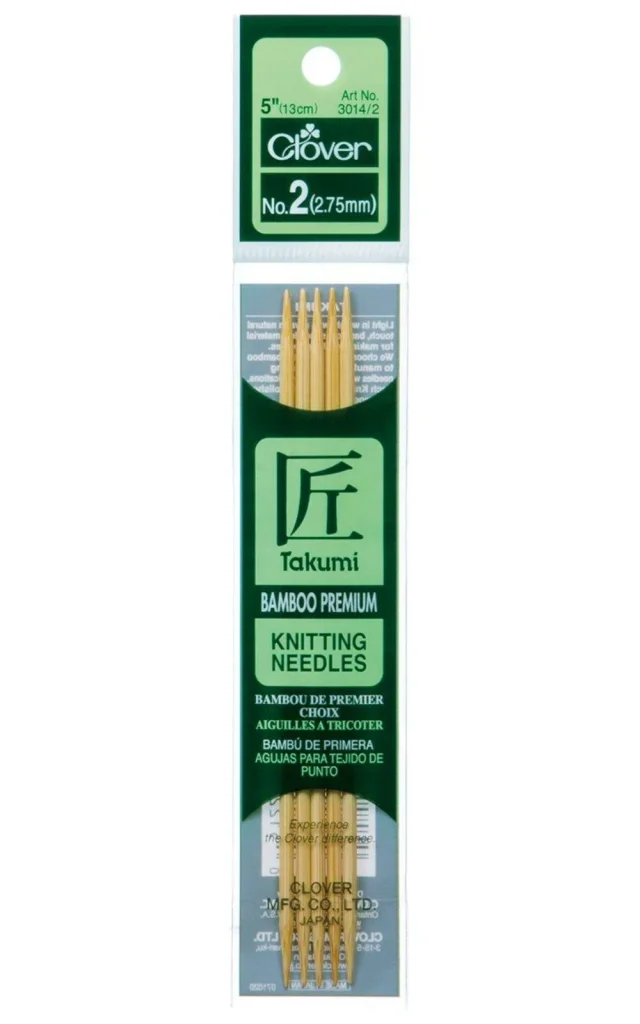
A lovely option for knitters who prefer bamboo needles. Their natural feel makes them worth considering for small projects such as baby booties, hats, and mittens.
Suggested Supply: 👉👉 Check price on Amazon.com
3. Clover Locking Stitch Markers
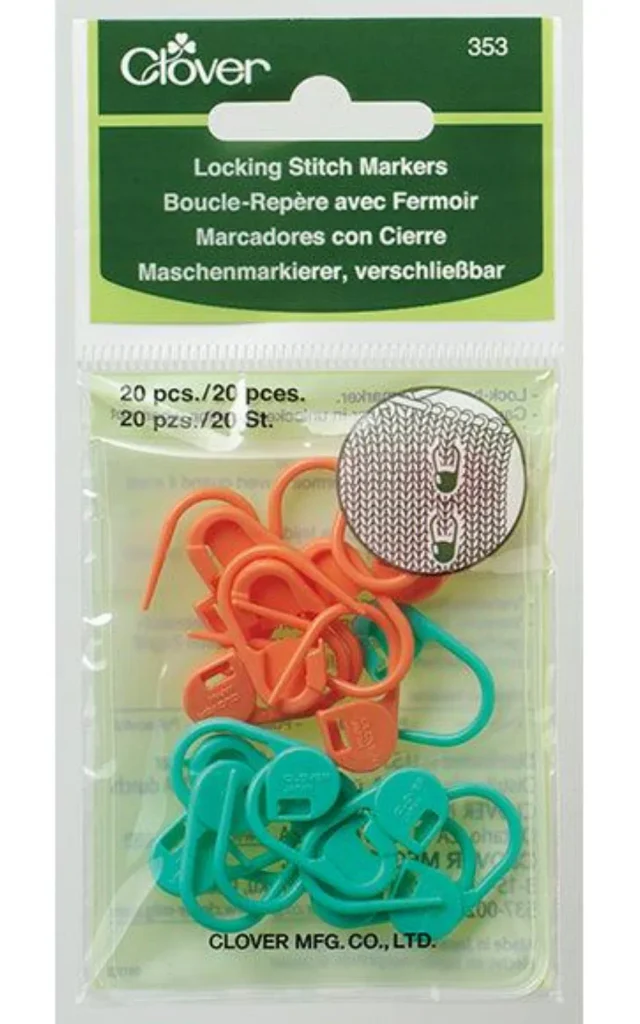
These handy accessories help identify stitch sections, shaping points, and pattern changes. They are particularly useful when making two matching baby booties.
Suggested Supply: 👉👉 Check price on Amazon.com
4. Knit Picks Yarn Swift and Ball Winder
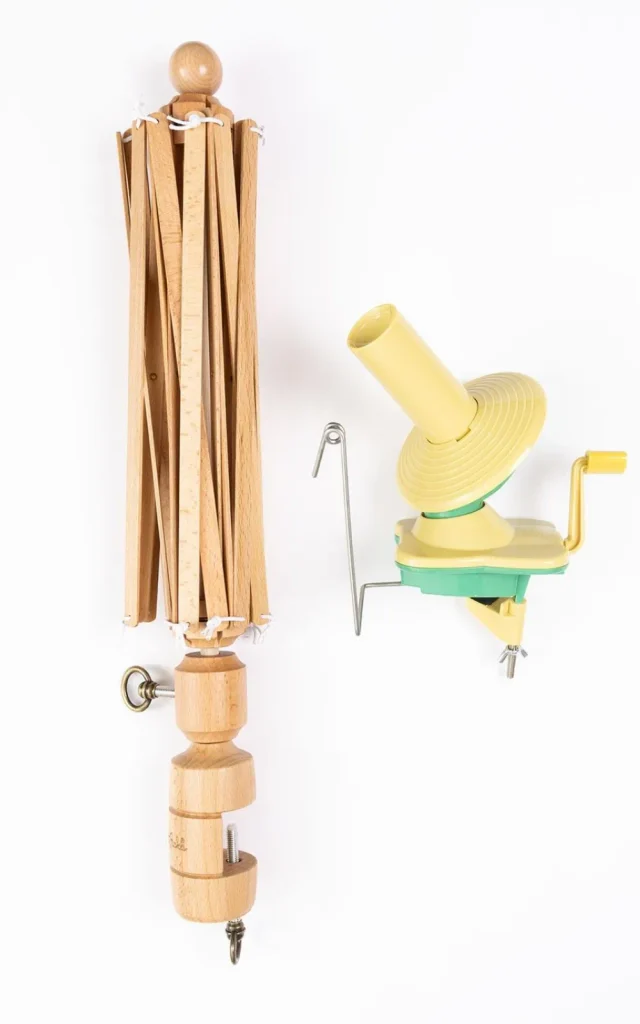
A useful investment for knitters who purchase yarn in skeins. This combination helps prepare yarn into manageable balls before starting knitting projects.
Suggested Supply: 👉👉 Check price on Amazon.com
5. KnitPro Knit Blockers and Blocking Pins
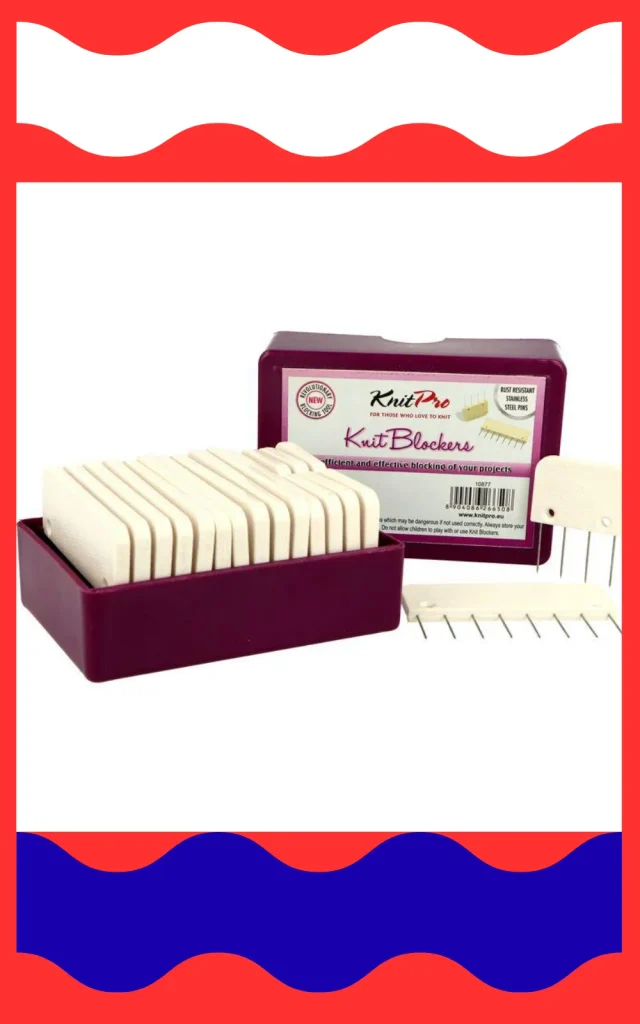
Helpful finishing accessories for gently shaping suitable knitted pieces after washing. They can help create a more even finish for handmade knitting projects.
Suggested Supply: 👉👉 Check price on Amazon.com
Frequently Asked Questions
1. Are knitted baby booties suitable for beginners?
Yes. A simple knitted baby bootie pattern can be a good beginner project. Start with basic stitches such as knit, purl, and garter stitch. You can add decorative details like bows and raised lines after you become comfortable with the basic construction.
2. What is the best yarn for knitted baby booties?
Soft baby-weight or DK yarn is a good choice. Look for smooth, washable yarn that is suitable for baby clothing. Check the manufacturer’s care instructions before purchasing.
3. How long does it take to knit a pair of baby booties?
The time depends on your knitting experience, the complexity of the design, and the yarn you use. A simple pair may take a few hours, while a detailed design with decorative stitching can take longer. Beginners should allow extra time for practicing and assembling the pieces.
4. Can I make these knitted baby booties in different sizes?
Yes. You can adjust the sole length, width, and upper section to suit the intended size. Always use a reliable size measurement and check your knitting gauge before changing the pattern.
5. How do I keep knitted baby booties from becoming too loose?
Use a suitable yarn and needle combination, check your knitting tension, and make sure the ankle cuff has enough stretch without being restrictive. Measure the finished booties before gifting them.
Conclusion
Making sage green knitted baby booties is a lovely way to enjoy a simple knitting project while creating something useful and beautiful.
The combination of soft yarn, textured stitches, ribbed ankle cuffs, and little knitted bows gives these baby shoes their charming handmade appearance.
You can follow the same design idea using cream, pink, beige, or other gentle colors to create your own collection. Start with the basic knitting techniques, work through each section carefully, and give yourself enough time to finish both booties neatly.
Most importantly, choose comfortable materials and pay attention to the finishing details so the final pair is soft, secure, and suitable for its intended use.
A handmade pair of baby booties is more than a small knitting project. It is a thoughtful gift made with care, one little stitch at a time.
Related Post: How to Make Money With Old Jeans at Christmas: Easy DIY Ideas to Sell