

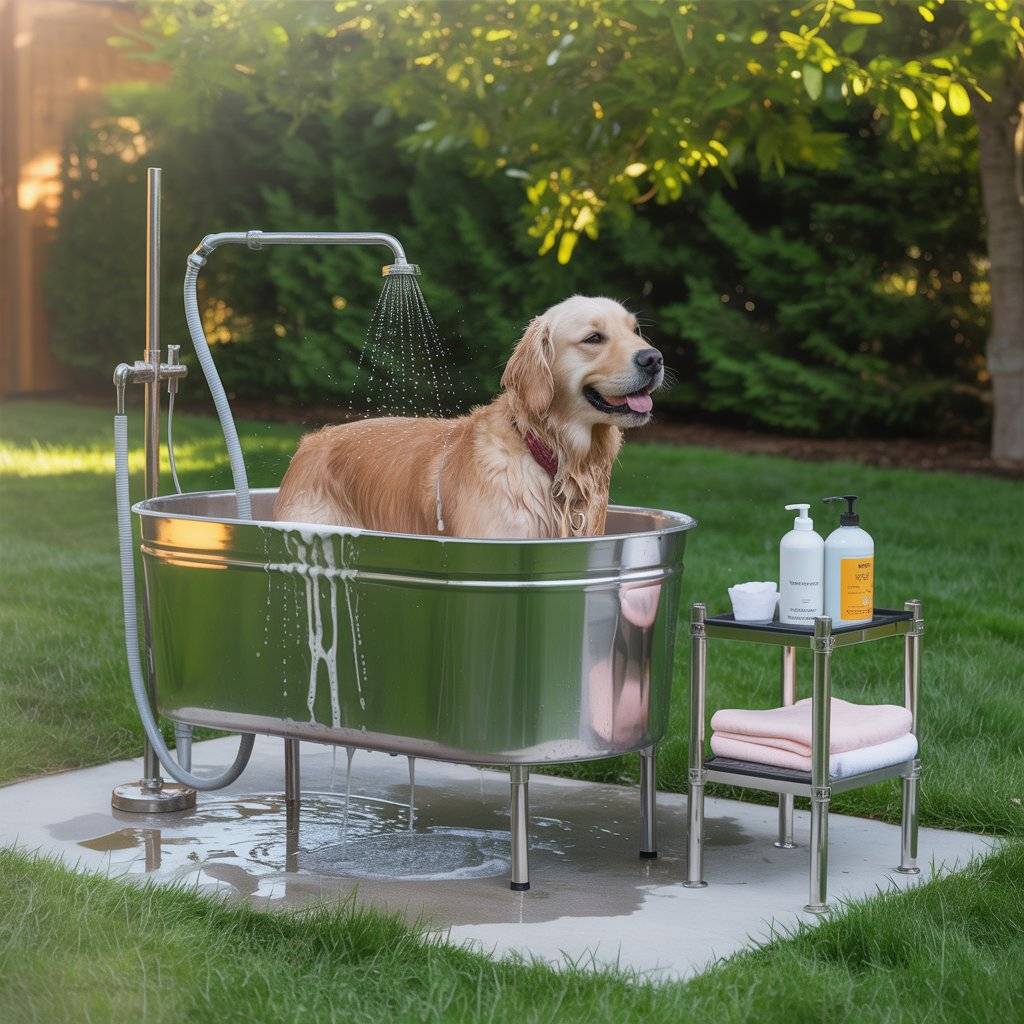
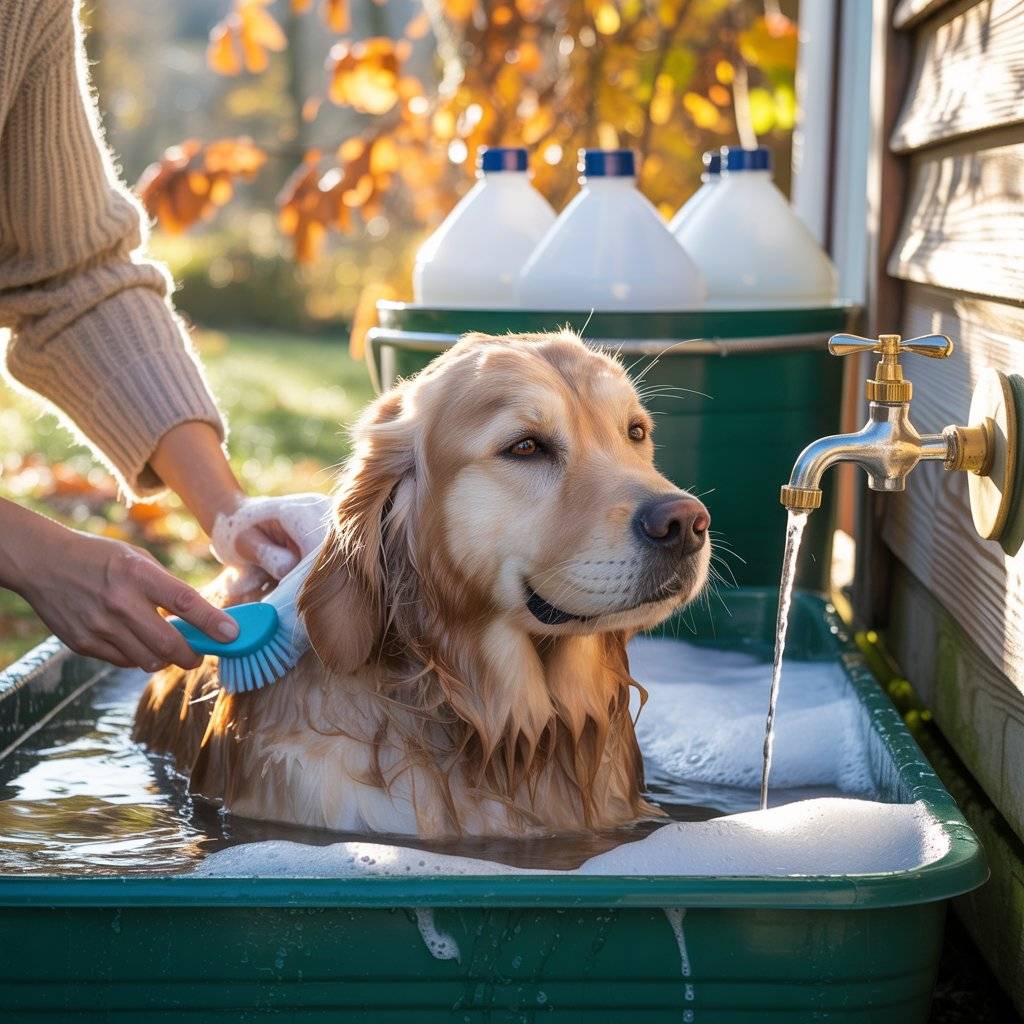
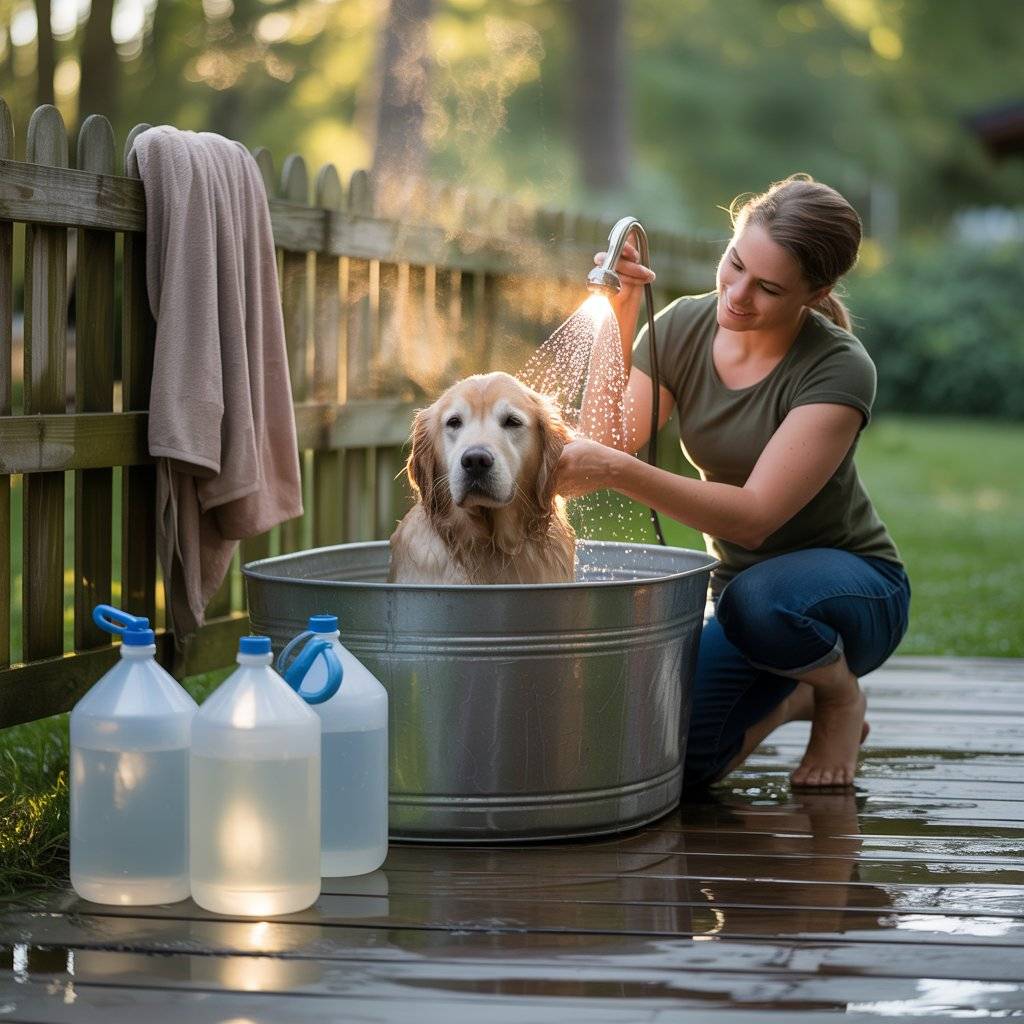
Bath your dog at home is rarely a good time. You either ends up bending over a slippery tub until your back aches, or you’re chasing a wet, soapy dog around the yard with a garden hose that sprays everywhere except where you need it.
The good news, you can fix all of that with a simple dog wash station right in your own backyard. It doesn’t have to be fancy or expensive. A designated washing spot outside keeps the mud and hair out of your house and makes bath time way easier on both of you.
This product can help you save your back, your bathroom, and your sanity all with a weekend project that actually works.
Why a Backyard Dog Wash Station Matters
If you have an active dog that loves mud puddles, rolling in who-knows-what, or just getting dirty on daily walks, you already know the struggle. Dragging them through the house to the bathtub leaves a trail of wet fur and dirty paw prints everywhere. And professional grooming adds up fast $30 to $90 per session depending on your dog’s size and coat type.
A backyard wash station solves both problems. You keep the mess outside where it belongs, and you stop spending money on groomers for every simple cleanup. Plus, having a regular spot for baths helps your dog get comfortable with the routine. Less stress for them means less stress for you.

How to Build Your Own Dog Wash Station
You don’t need to be a master plumber or spend a fortune. Here’s the simple process broken down.
Step 1: Pick Your Spot
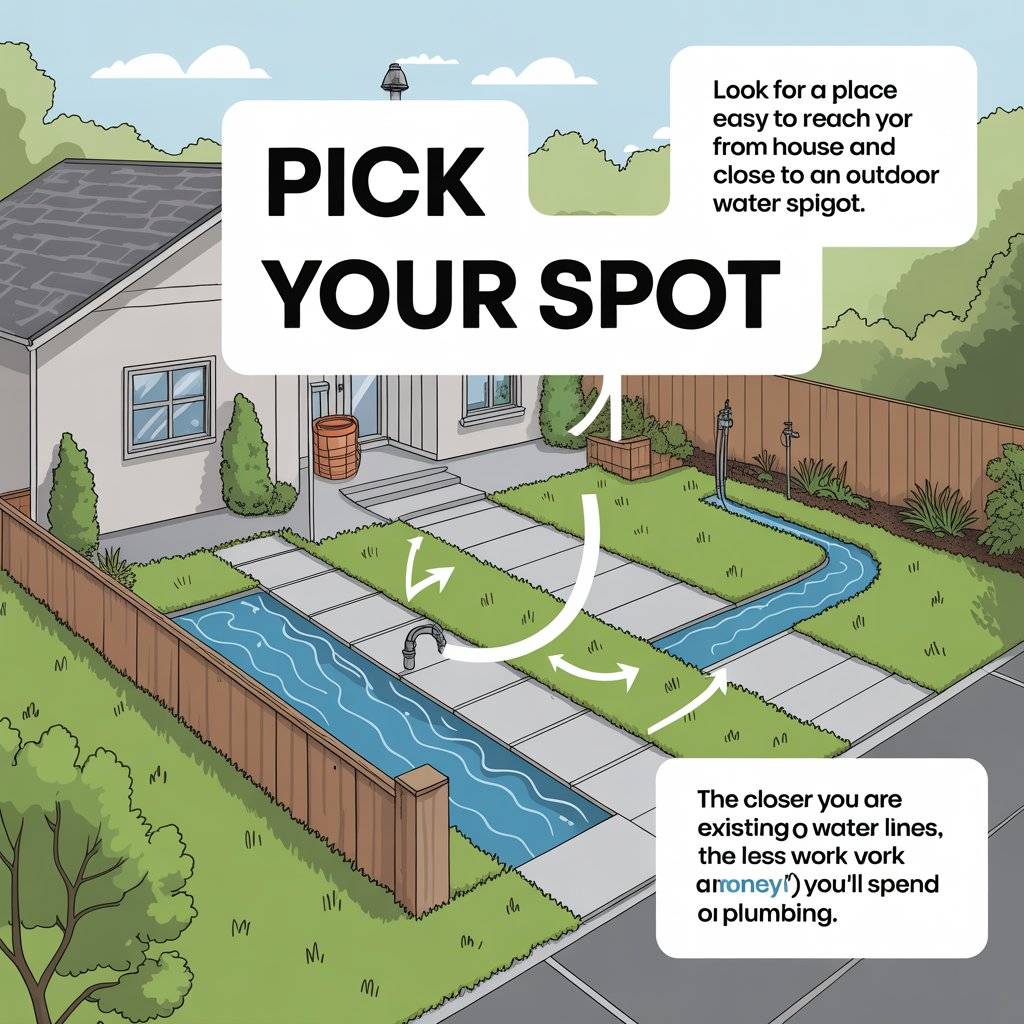
Look for a place that’s easy to reach from your house and close to an outdoor water spigot. The closer you are to existing water lines, the less work (and money) you’ll spend on plumbing. Also think about drainage you want a spot where water can flow away without pooling up and creating a muddy mess.
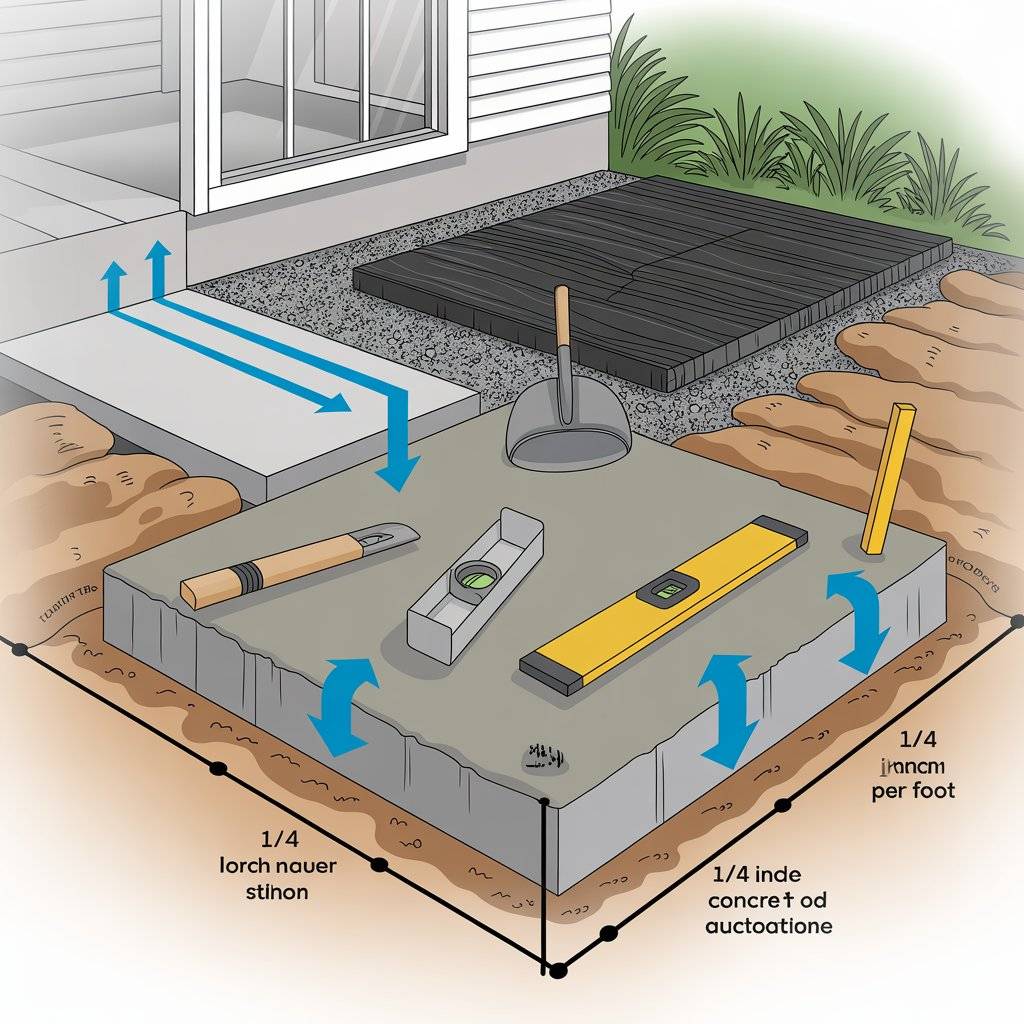
Step 2: Build a Simple Base
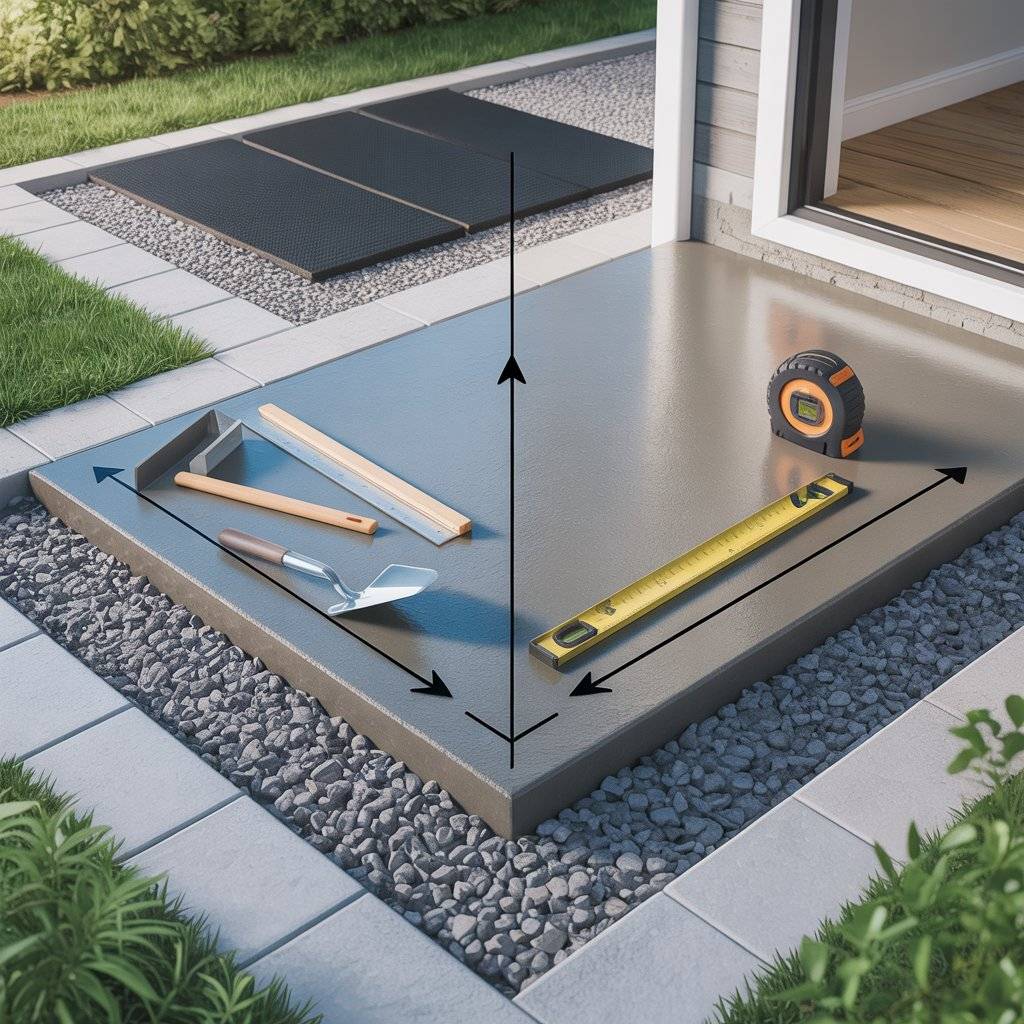
A concrete pad is your best bet for a permanent station. It’s durable, easy to clean, and stands up to the weather. Pour a slab with a slight slope (about 1/4 inch per foot) so water runs toward a drain or garden area instead of your house foundation. If concrete sounds like too much work, you can start with a rubber mat over a flat area of gravel or packed dirt.
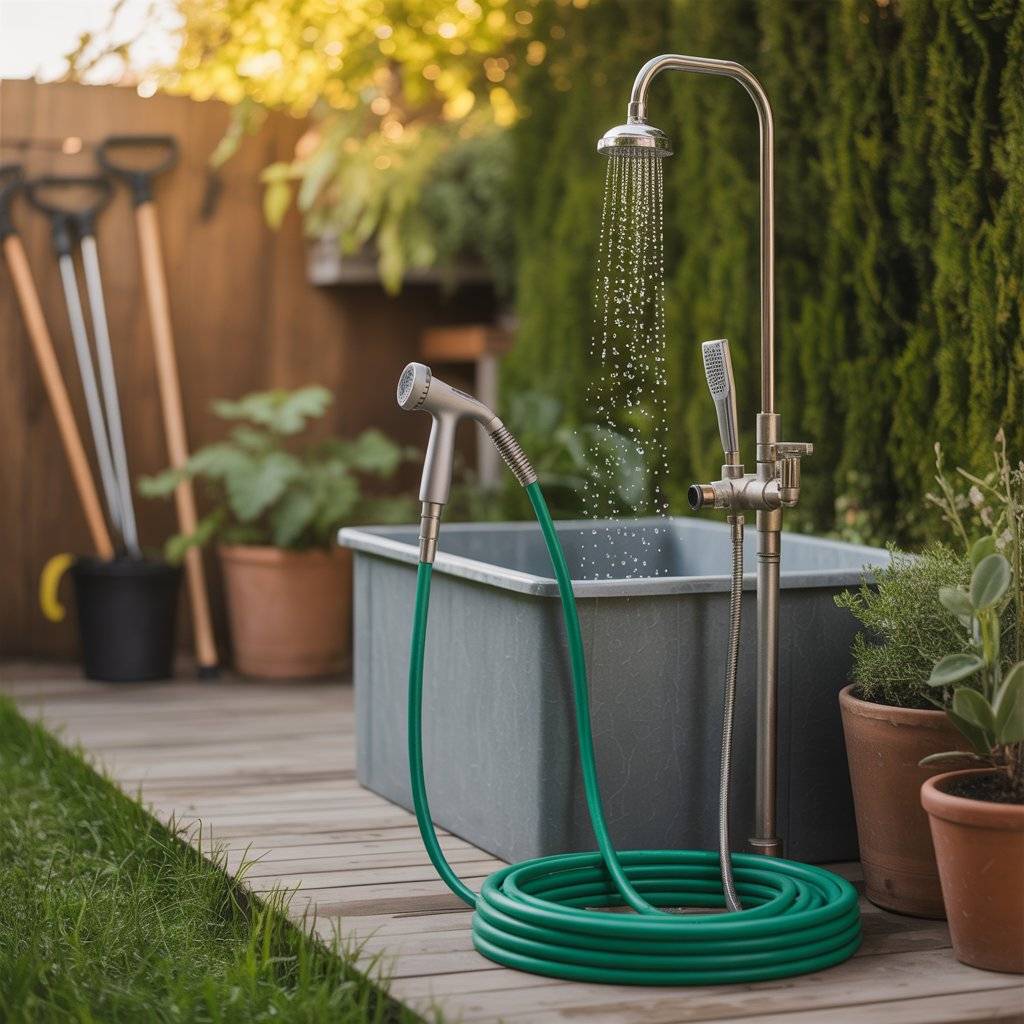
Step 3: Add Your Water Setup
A simple garden hose with a handheld spray nozzle works fine to start. But if you want to get fancy, install a proper outdoor shower head or handheld sprayer. This product can help you control the water pressure and reach all those tricky spots like muddy paws and belly fur.
Step 4: Keep Supplies Handy
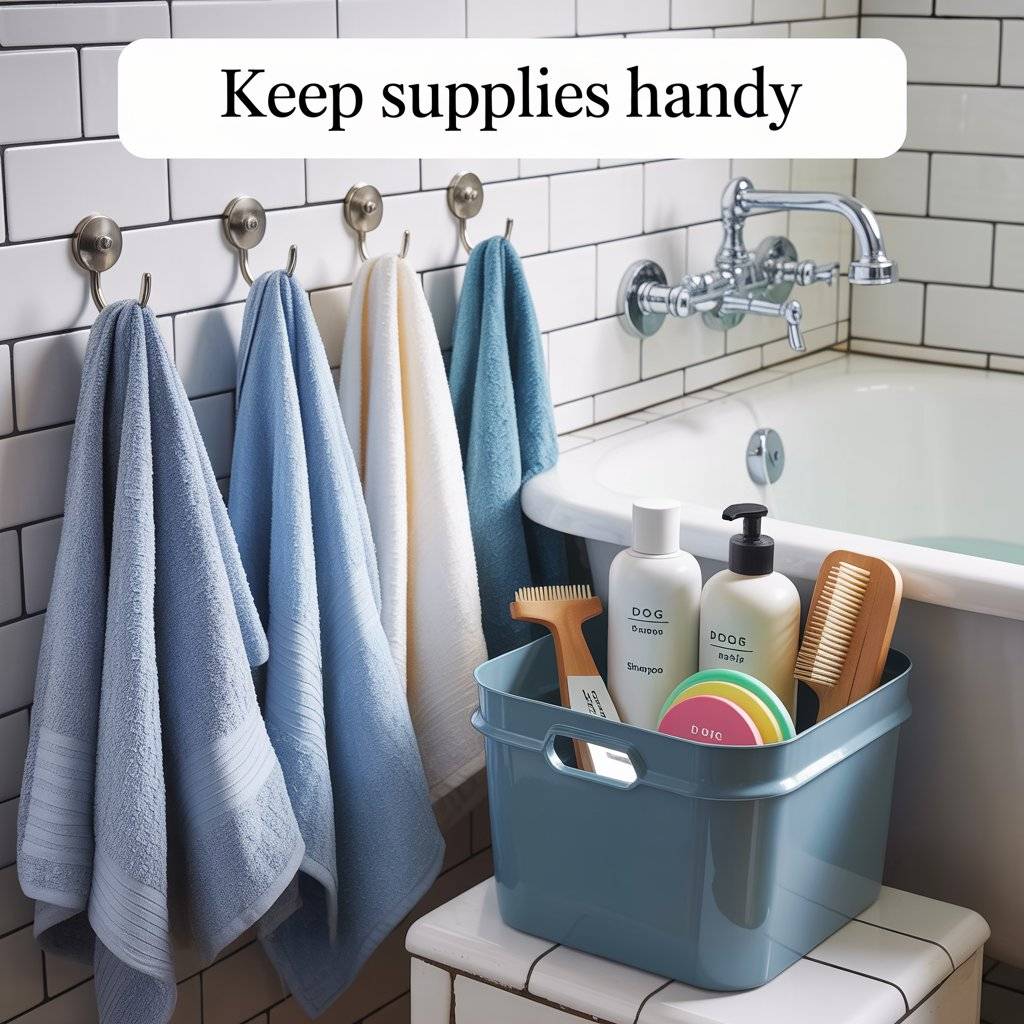
Add some hooks for towels and a small waterproof bin for shampoo, brushes, and treats. When everything has a place, bath time goes faster and feels less like a wrestling match.

5. Install a Simple Tether or Hitching Point

Dogs have a funny way of realizing bath time is coming and deciding they need to be anywhere else. A simple tether keeps your dog from wandering off mid-wash, but it should never feel like punishment. Install a sturdy eye bolt into a post, fence, or even a pressure-treated 4×4 set in concrete near your wash station.
Attach a short, waterproof lead (about 3 to 4 feet long) that clips to your dog’s collar or harness. This gives them just enough room to stand comfortably but not enough to walk away or shake soap all over you.
Make sure the tether is strong enough for your dog’s size a lightweight clip for a Chihuahua won’t hold a 70-pound Labrador. And never leave your dog tethered and unattended, even for a minute. This small addition saves you from the constant “come back here” chase and makes the whole process faster for everyone.
6. Add a Warm Water Option for Cold Days
Washing your dog with cold water on a chilly morning is miserable for both of you. Your dog will shiver, and you’ll rush through the job just to get it over with. The fix is surprisingly simple.
You can buy an outdoor faucet mixer that screws onto your existing spigot and connects to both your cold water line and a hot water line from inside your house. If that sounds like too much plumbing, a cheaper workaround is to fill a few gallon jugs with warm water from your kitchen sink before you head outside.
Keep them in a cooler to stay warm, and dip your dog’s brush or cup into them as you wash. This product can help you avoid the shock of cold water hitting a warm dog’s back. A little warmth makes bath time feel less like a punishment and more like a spa day or at least a tolerable chore.
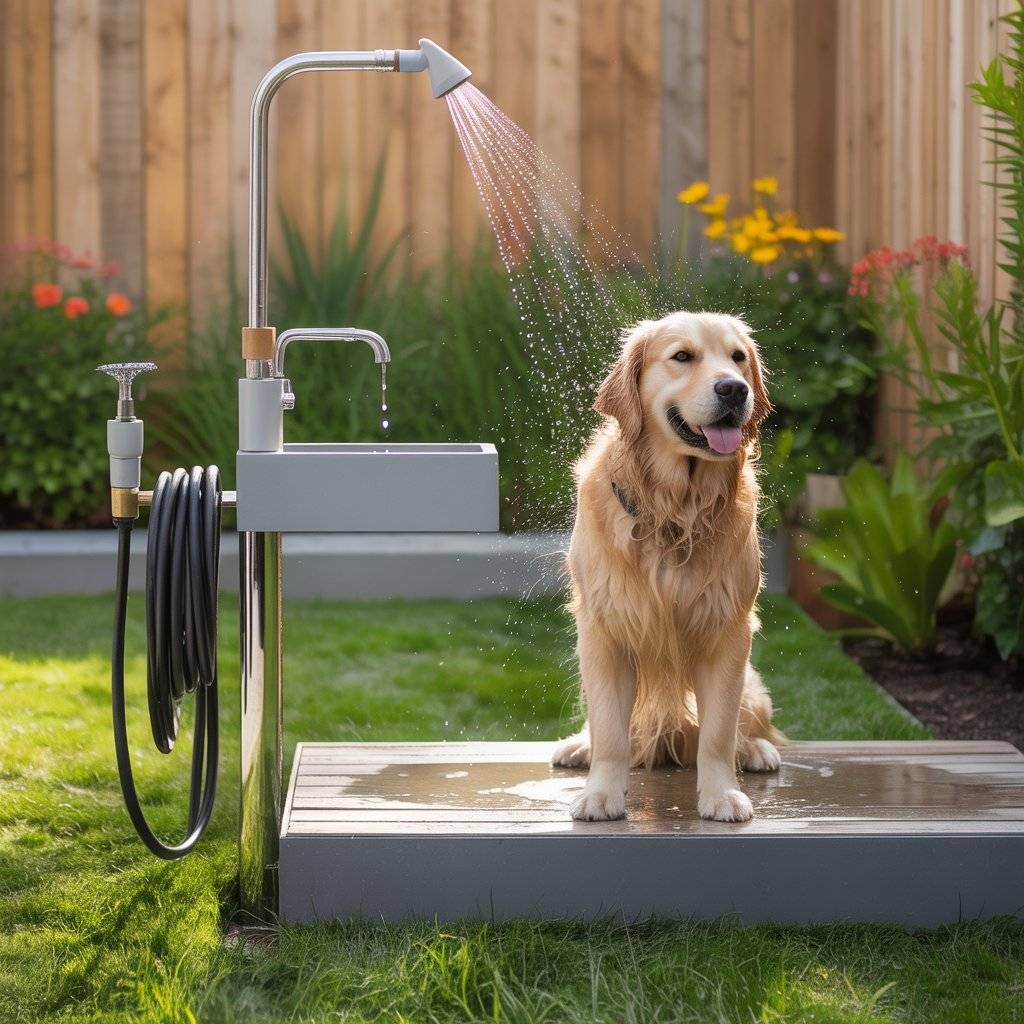
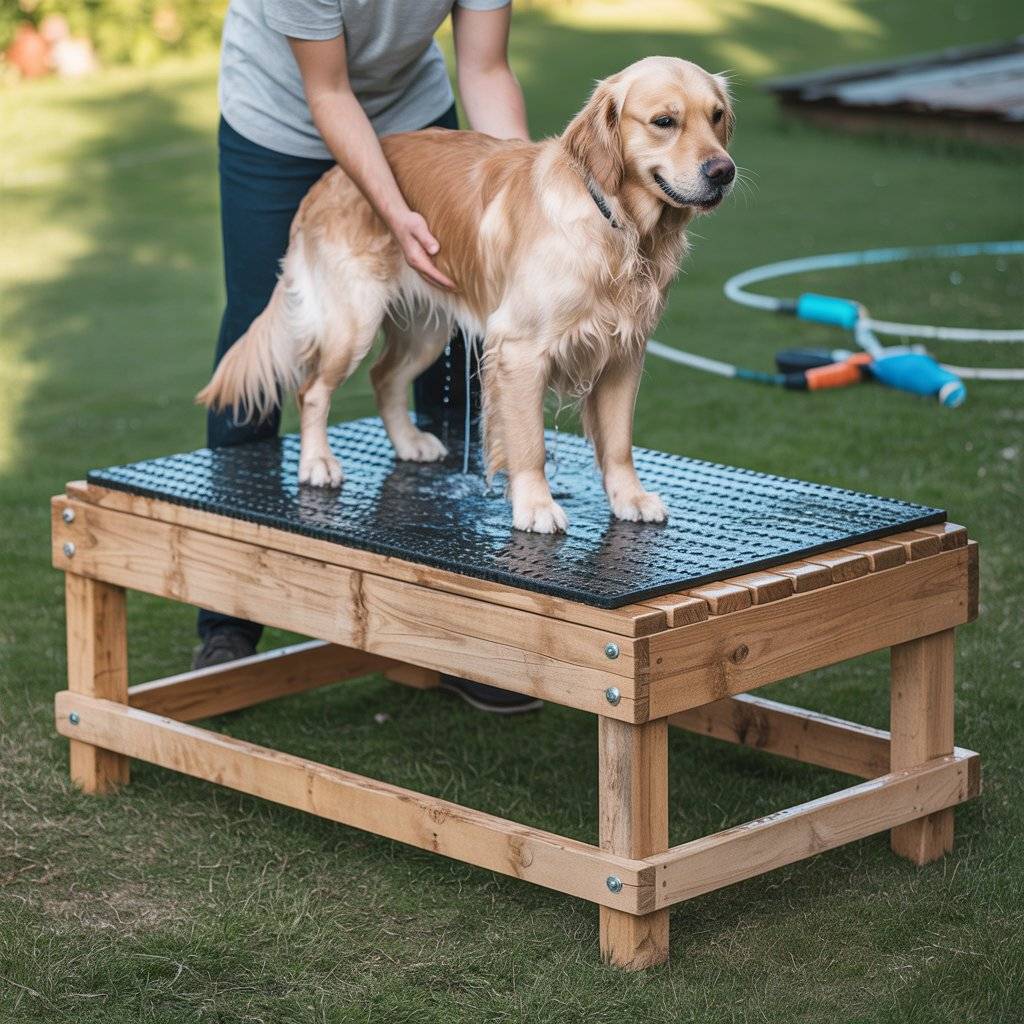
7. Build a Raised Platform for Your Dog
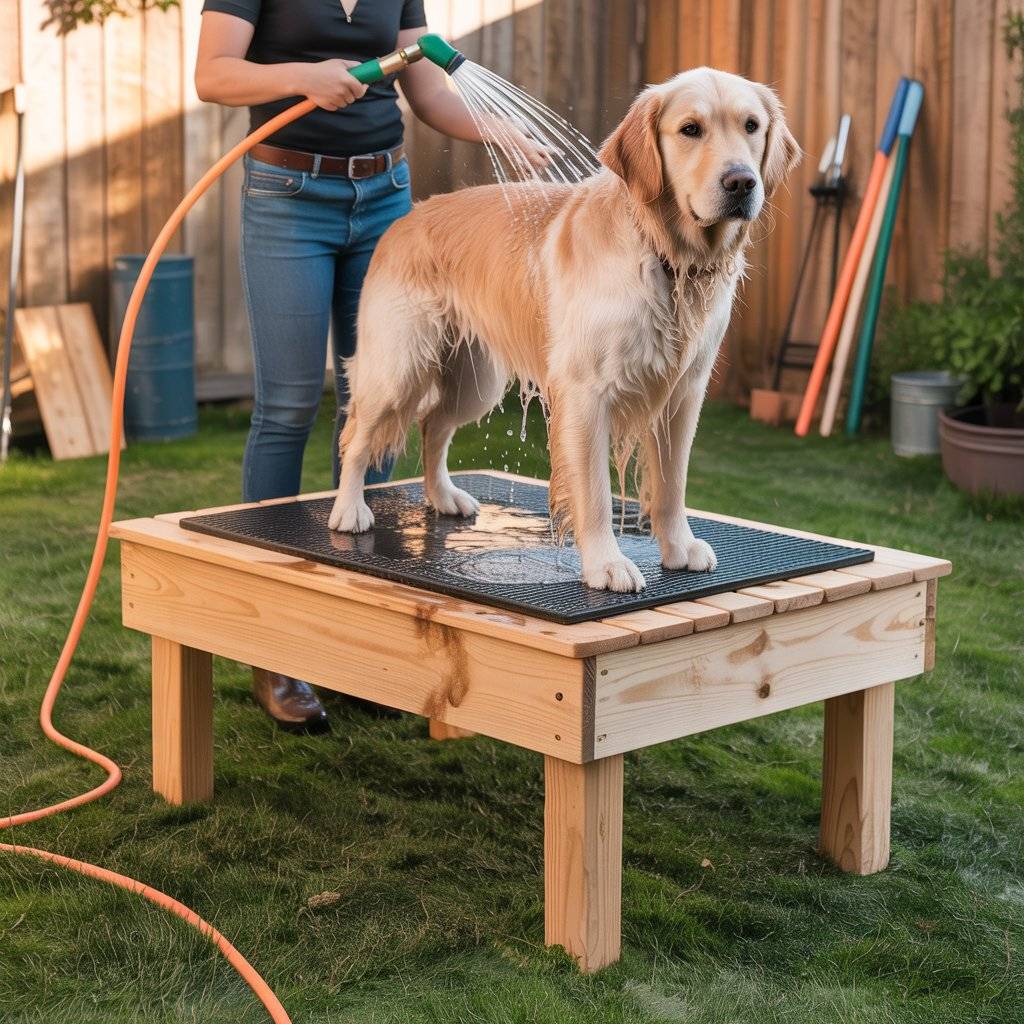
Bending all the way to the ground to scrub a large dog’s belly is a backache waiting to happen. A raised platform solves that problem. Build a simple wooden frame about 12 to 18 inches high, just big enough for your dog to stand on.
Cover it with a rubber stall mat or outdoor carpet for traction. The platform doesn’t need to be fancy just sturdy enough to hold your dog’s weight without wobbling. Smaller dogs might need a ramp or steps to get up comfortably. Once your dog is on the platform, you can wash them at waist height instead of ground level.
This is especially helpful for older dog owners or anyone with chronic back pain. You can also buy pre-made grooming tables, but a DIY version costs a fraction of the price. Even a heavy-duty plastic storage bin turned upside down can work in a pinch.
8. Use a Recirculating Pump to Save Water
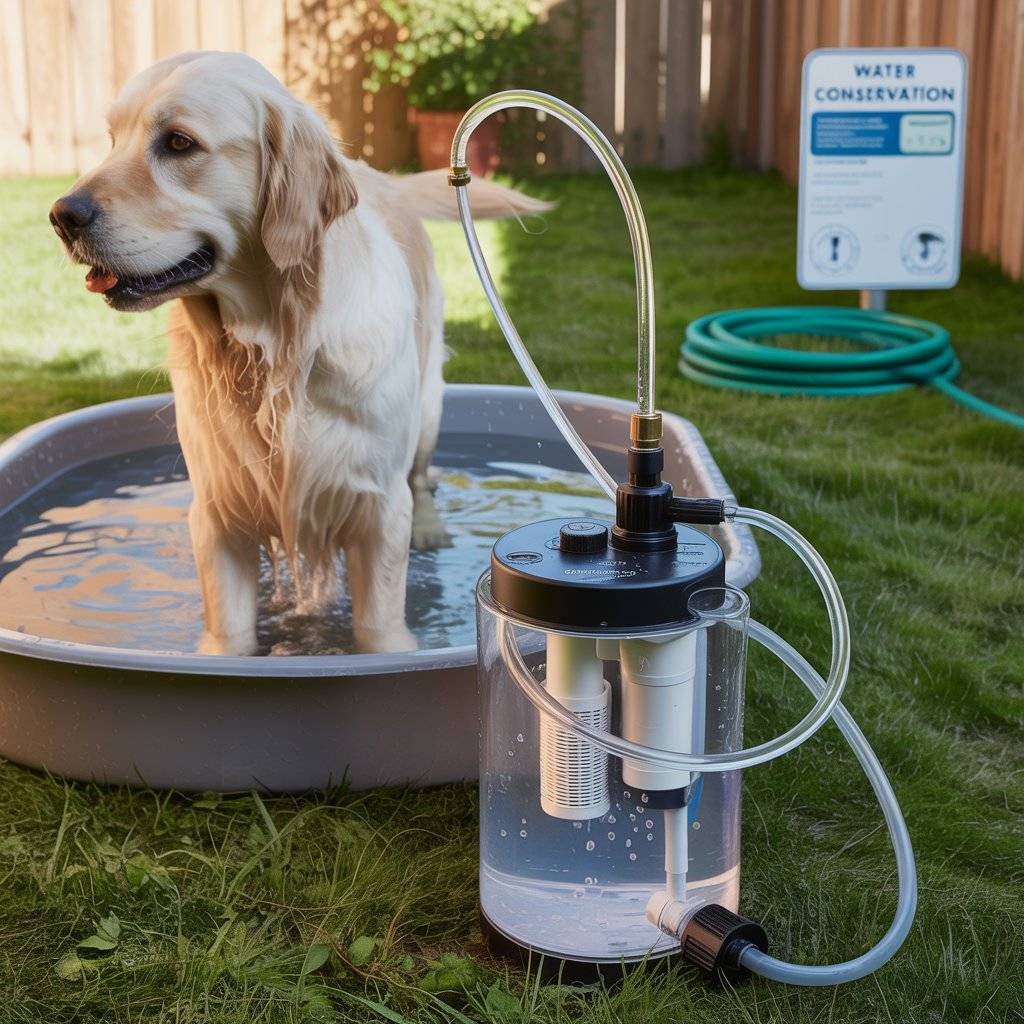
If you live in an area with high water bills or drought restrictions, running a hose for 10 minutes every time your dog gets dirty adds up. A recirculating pump changes the game. These pumps sit in a bucket or basin at your dog’s feet.
They pull the water out, run it through a simple filter, and send it back up through your sprayer. You fill the bucket once with warm, soapy water, and it keeps cycling through the wash. This product can help you cut water usage by 80 percent or more.
You still need a final rinse with fresh water, but the main washing phase uses the same water over and over. Recirculating pumps are common in mobile pet grooming vans, but small, affordable versions work great for home use. Just make sure to clean the filter after each use so soap scum and fur don’t clog it up.

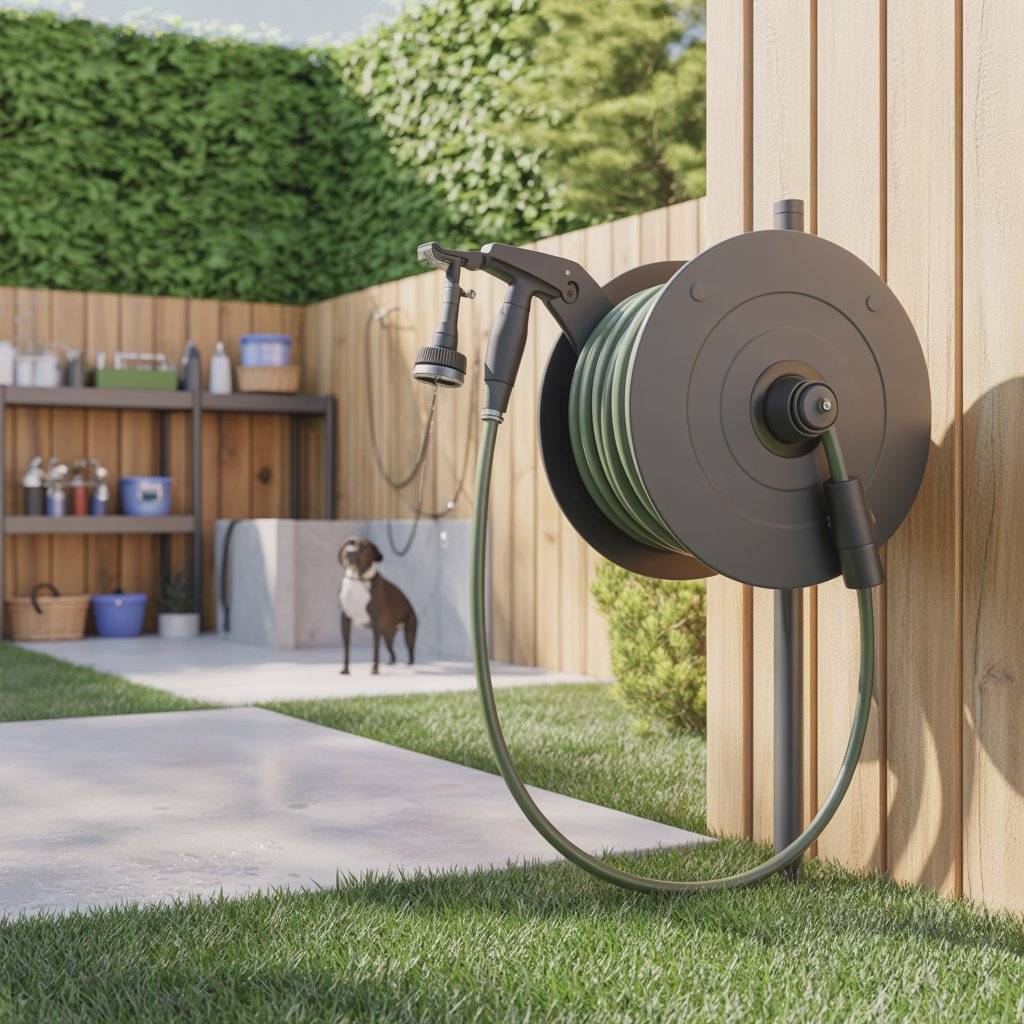
9. Install a Retractable Hose Reel
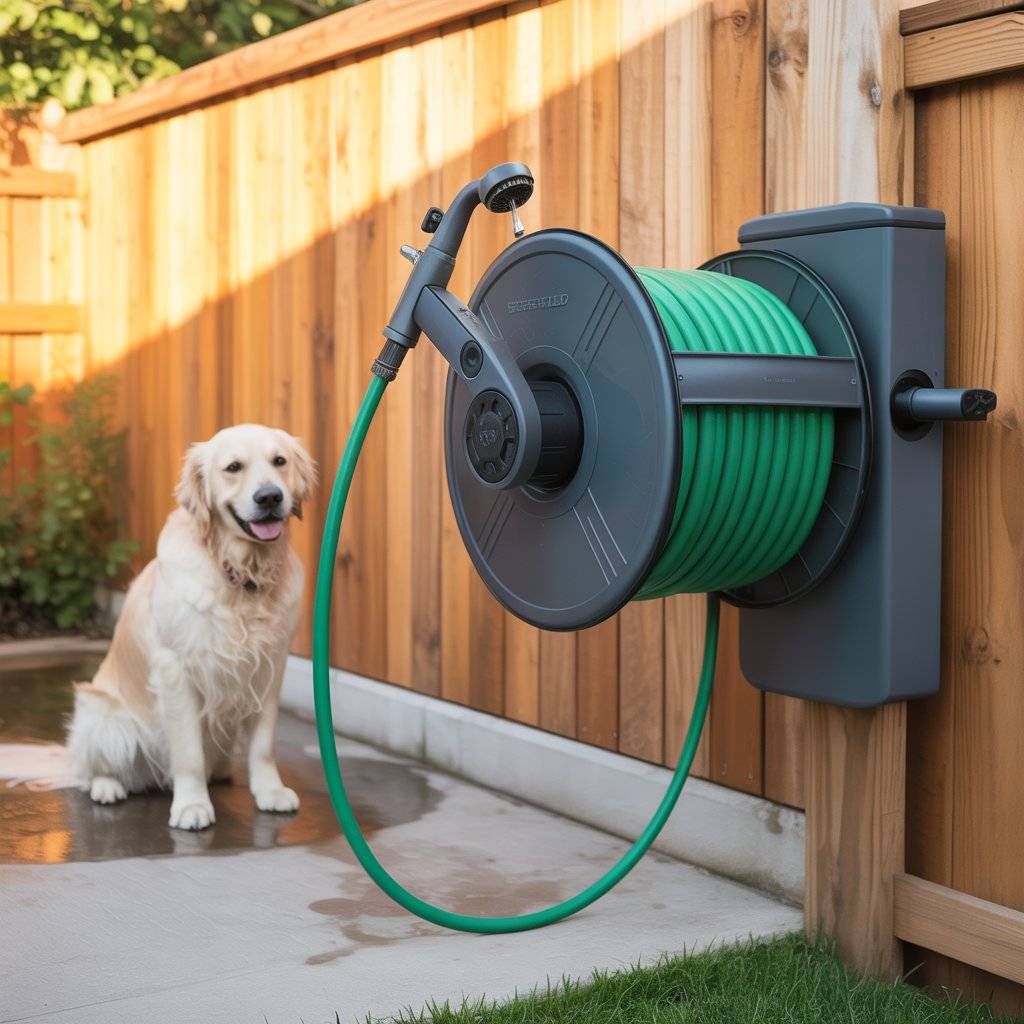
Nothing kills the flow of bath time like wrestling with a tangled hose that’s coiled up in a messy pile by the fence. A retractable hose reel mounted on the wall or a post near your wash station keeps things tidy and ready to go.
You pull out only as much hose as you need, and when you’re done, it automatically winds back up. Look for a reel rated for outdoor use and long enough to reach your whole washing area (25 to 50 feet is plenty for most backyards).
Some models come with a built-in spray nozzle holder and a swivel mount that lets you pull the hose in any direction without kinking. This small upgrade saves you time and frustration every single bath. Plus, a neatly stored hose lasts longer because it’s not sitting in the sun getting brittle or lying in the mud getting chewed on.
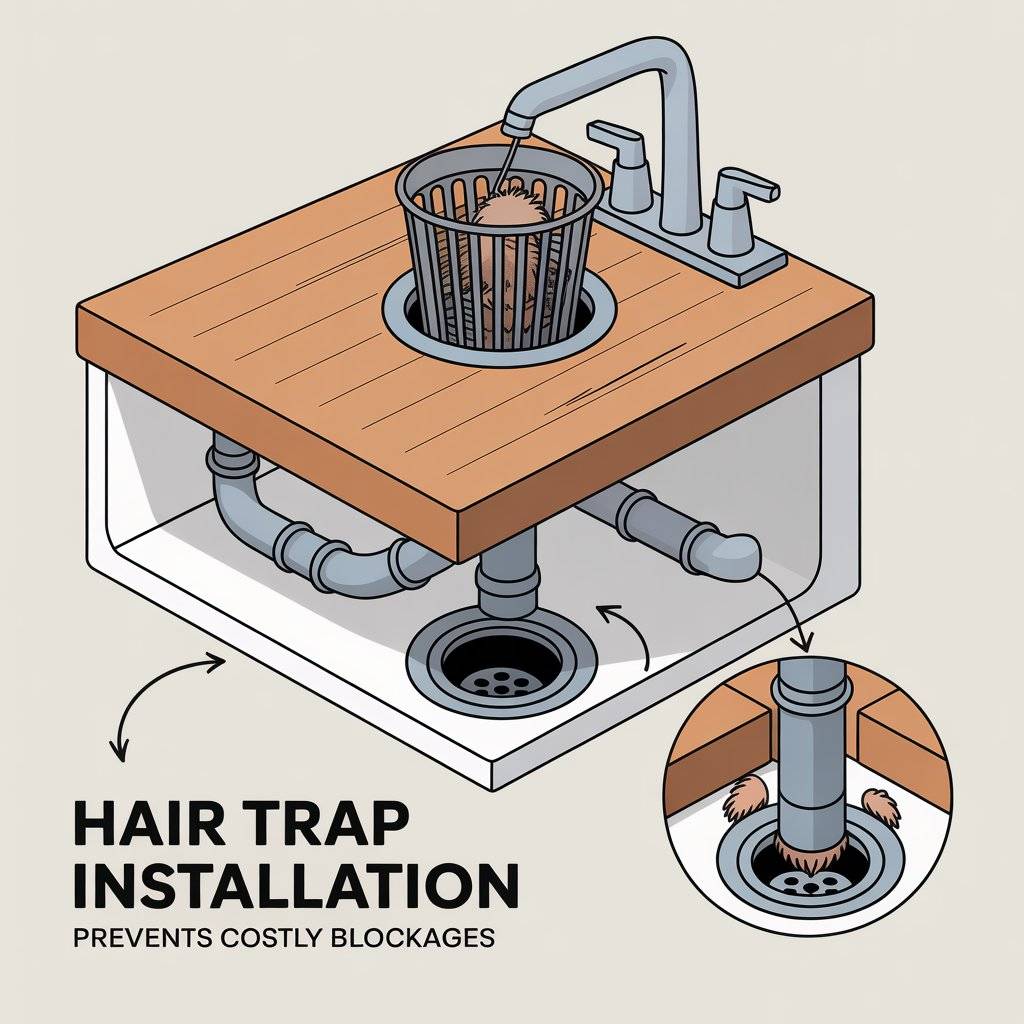
10. Add a Hair Trap to Your Drain System
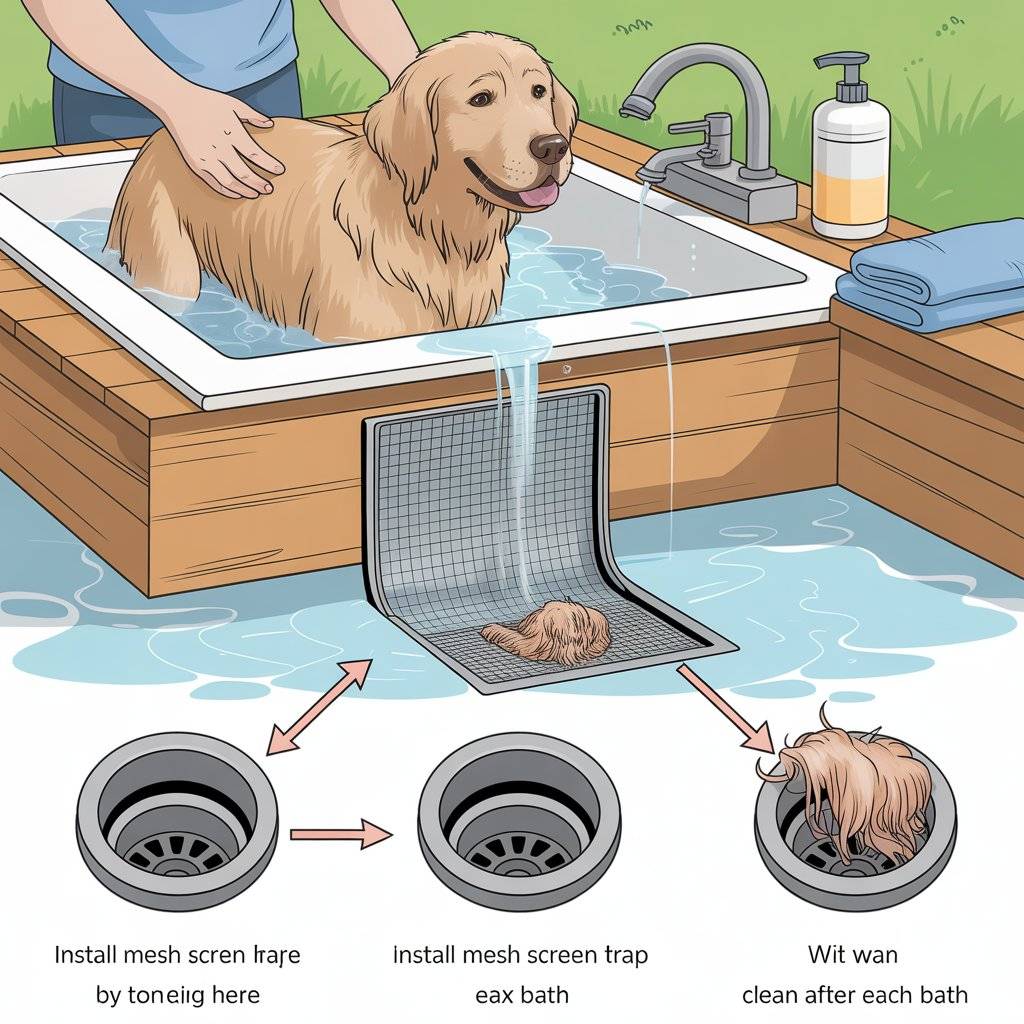
Dog fur and water drains do not get along. Loose hair clumps up, sticks to pipes, and creates nasty blockages that smell terrible and cost money to fix. A simple hair trap catches most of that fur before it ever enters your drain.
These are the same mesh screens or basket strainers used in household showers. Place one over your drain opening or install a small catch basin underneath your wash platform. Clean it out after every single bath just pull off the wet fur and toss it in the trash.
If you’re draining directly onto the ground, a hair trap might not be necessary, but any system with pipes needs one. Even a piece of window screen rubber-banded over the drain works in a pinch. This five-second habit saves you from calling a plumber six months from now when nothing drains and your yard smells like wet dog.
11. Create a Drying Zone Right Next to the Wash
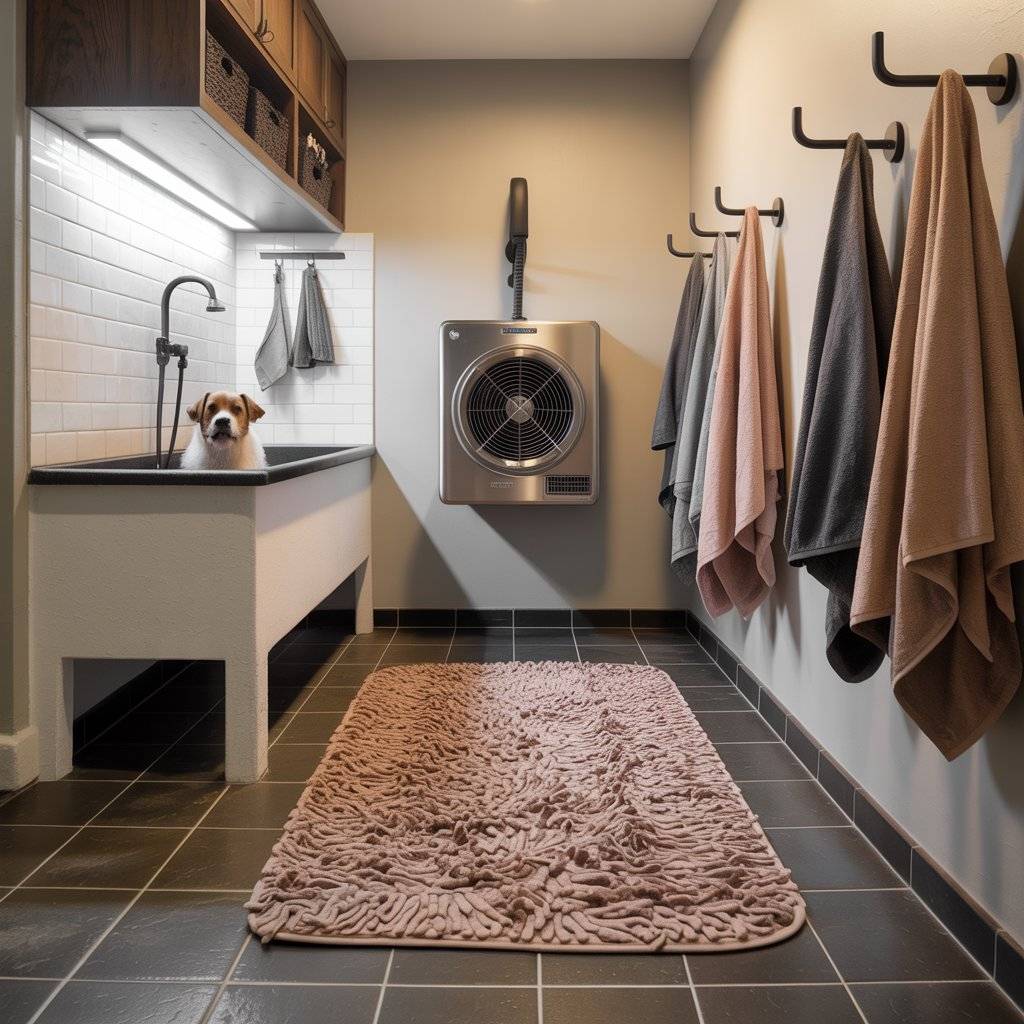
Getting your dog clean is only half the battle. The moment you turn off the water, they’re going to shake usually right in your face. A dedicated drying zone next to your wash station contains the mess and speeds things up.
Lay down a large, absorbent mat made of microfiber or shammy material. Hang a few heavy-duty towels and a pet-specific microfiber drying towel on hooks nearby. If you really want to go all out, mount a simple wall-mounted pet dryer (like a forced-air dog dryer, not a human hair dryer).
These dryers blow room-temperature or slightly warm air at high speed, which dogs tolerate better than loud, hot human dryers. Even without a dryer, having a spot where you can wrap your dog in a towel and rub them down prevents the mad dash through the wet grass back to the house.

12. Keep a “Bath Time Only” Treat Bucket
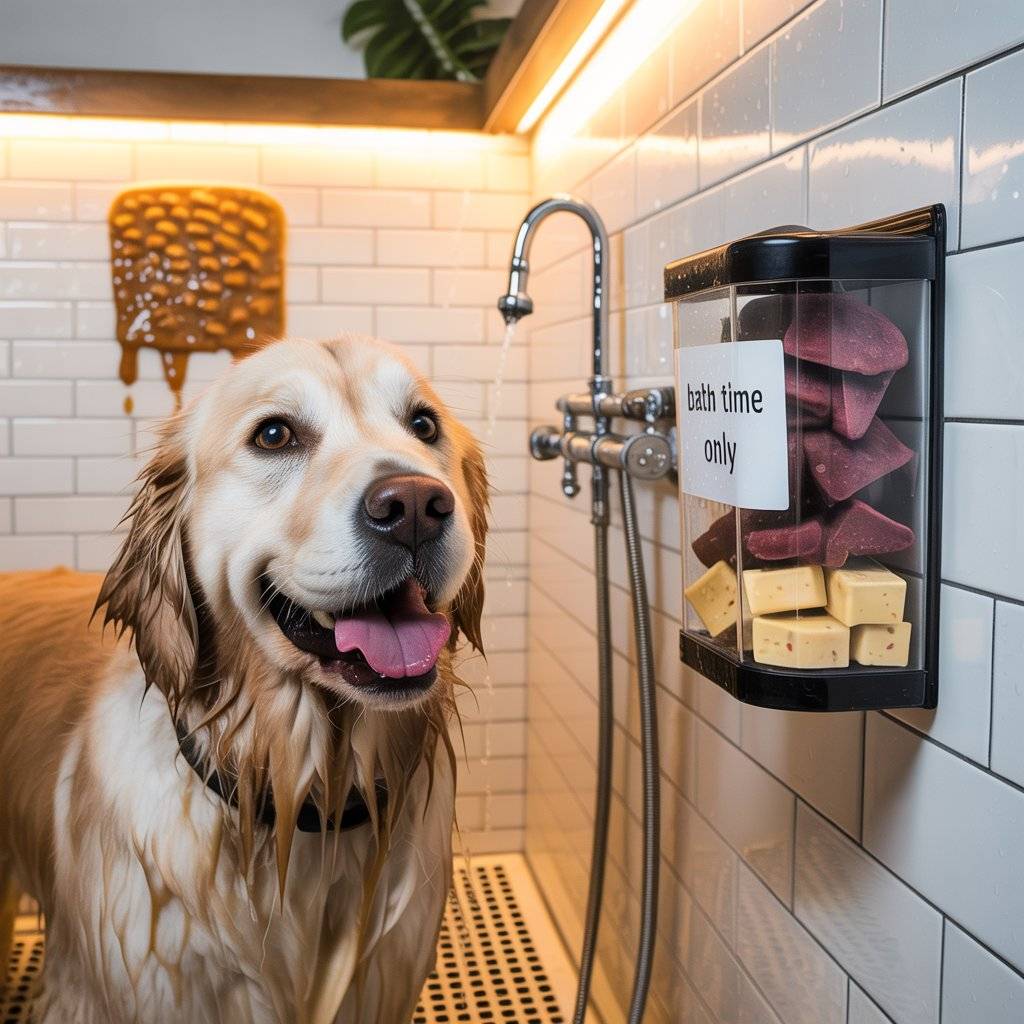
Most dogs will tolerate a bath if they know a reward is waiting at the end. Hang a small waterproof container near your wash station and fill it with high-value treats that your dog only gets after a bath.
Think stinky, soft treats like freeze-dried liver, small bits of cheese, or training treats. Immediately after you finish drying your dog off, give them a treat right there in the wash zone. Over time, your dog will start to associate the whole wash station experience with something positive, not just the cold water and scrubbing.
This works especially well for anxious or resistant dogs. You can also use a lick mat smeared with peanut butter stuck to the wall of the wash station to keep them distracted during the actual bath. Positive reinforcement isn’t just for trainingit’s for making your life easier, too.

Tips
Always brush your dog first. Getting rid of loose fur and mats before the bath means less hair clogging your drain and a cleaner wash overall.
Use dog-specific shampoo. Human shampoo (even baby shampoo) can mess up your dog’s skin pH and cause irritation. Grab something made for dogs.
Put cotton balls in their ears. This keeps water out and helps prevent ear infections. Avoid spraying directly near their head.
Check water temperature. Water that’s too hot or too cold will make your dog hate bath time. Aim for lukewarm just like you’d use for a baby.
Mistakes to Avoid
Skipping the drain plan. If you don’t figure out where the water goes before you start washing, you’ll end up with a swampy yard and angry neighbors. Make sure you have a slope, a French drain, or a dry well to handle the runoff.
Forgetting about cold weather. If you live somewhere with freezing temperatures, your pipes can burst. Install insulated pipe covers or plan to shut off and drain the system before winter hits.
Building at the wrong height. A station that’s too low will kill your back. A station that’s too high makes it hard for your dog to get in and out. Think about what’s comfortable for both of you before you start building.
Using the wrong flooring. Slippery surfaces are dangerous for you and your dog. Stick with rubber mats, textured concrete, or composite decking that gives you traction even when wet.
FAQs
How much does a DIY dog wash station cost?
A simple setup can cost as little as $30 to $60 using a basin, hose attachment, and rubber mat. A more permanent concrete and plumbing project might run you a few hundred dollars.
Do I need a plumber?
For a basic hose setup, no. If you want to tap into your home’s hot water line or install a permanent shower fixture, you might want to call a professional.
What about drainage?
For outdoor stations, you can let water drain naturally into the yard as long as you have good ground absorption and a slope away from your house. Just avoid using soaps that could harm your plants.
Can I use this in winter?
Only if you winterize it. Shut off the water supply, drain all pipes, and store your hose indoors to prevent freezing damage.
Design Ideas
The Concrete Pad with Brick Rim
Pour a simple concrete floor and line it with rock tiles or bricks to hold in the water. Mount a handheld sprayer on a post at the back. This is a permanent solution that looks clean and handles any size dog.
The PVC Pipe Shower
Build a frame from PVC pipes with small holes drilled along the top. Hook it up to a garden hose, and water sprays down like a gentle rain shower. This is cheap, easy, and perfect for quick rinses after muddy walks.
The Recessed Wash Area
Dig out a slightly sunken area in your yard and line it with gravel or a rubber mat. The lower spot keeps water contained and prevents it from running everywhere. Add a hose hook-up nearby and you’re done.
Conclusion
A backyard dog wash station doesn’t need to be complicated or expensive. Start small with a rubber mat and a hose if that’s what works for you. Or go all-in with a concrete pad and permanent plumbing if you want something built to last. Either way, you’ll stop dragging muddy dogs through your house and start enjoying bath time a whole lot more.
Your back will thank you. And your dog? Well, they might still hate baths. But at least now it’ll be quick, easy, and outside where the mess belongs.
Related Post: